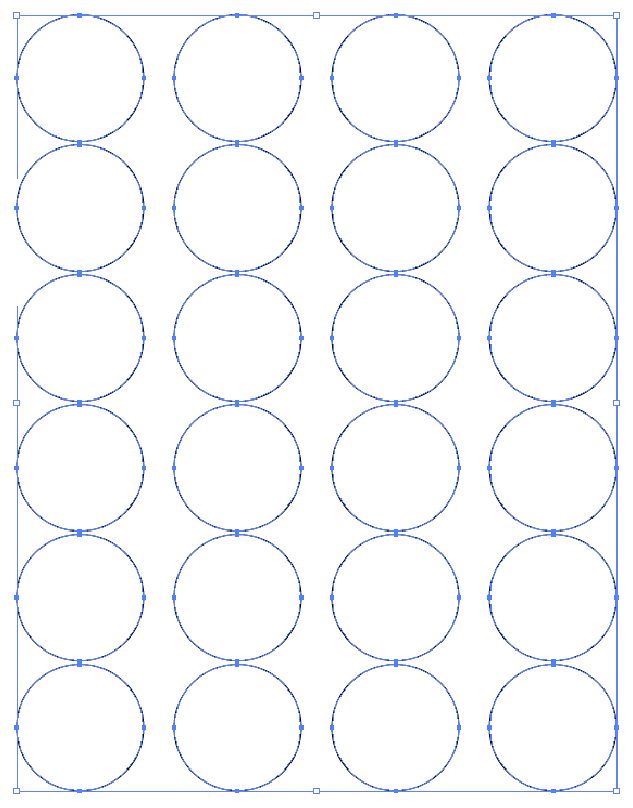
Begin by launching Adobe Illustrator. Any version of Illustrator will do. From the File menu choose Open. Open round labels WL-325 PDF template from World Label, a manufacturer of Printer labels for laser and inkjet printers.
SELECT THE CIRCLES.
Once the file opens click on the grid to select all the circles.
CHOOSE OBJECT > COMPOUND PATH.
 Select Compound Path at the bottom of the Objects Menu.
RELEASE THE COMPOUND PATH
 Choose Release from the Compound Path submenu. This way you’ll be able to select one circle instead of all the circles.
CHOOSE FILE > SAVE AS….
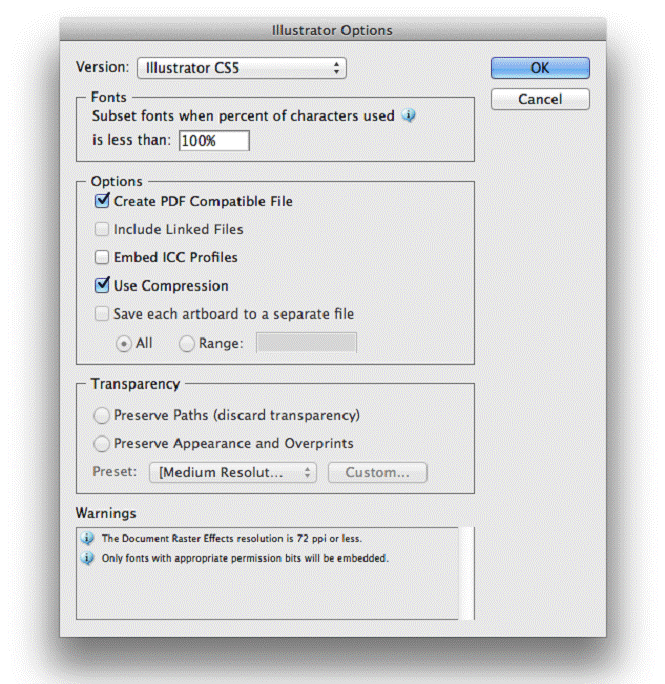
Save your file in Illustrator format (.ai). Choose whatever version you have. Check Create PDF Compatible File and Use Compression as seen in this screen shot. Click OK to accept the settings.
SWITCH TO OUTLINE MODE TO SEE CIRCLES.
After applying None to the circles they’ll appear to disappear from your page. To see the circles now choose View > Outline.
CHOOSE THE TYPE ON A PATH TOOL
Go to the Tools panel and click and hold on the Type Tool. Several variations of the Type Tool will appear in a submenu. Click and highlight the Type on a Path Tool.
CLICK TO INSERT THE TYPE ON A PATH CURSOR.
Click at 12 o’clock on your circle to insert the Type on a Path cursor.
SET THE PARAGRAPH ALIGNMENT TO THE CENTER.
Click on the Center button in the control panel to set your paragraph alignment.
DRAG THE PATH HANDLES TO 9 AND 3 O’CLOCK
Use the black arrow to drag the handles of your text path to 9 and 3 o’clock. This defines the beginning of your text (9 o’clock) and the end (3 o’clock). The tall line at 12 is the center of your text.
TYPE YOUR TEXT.
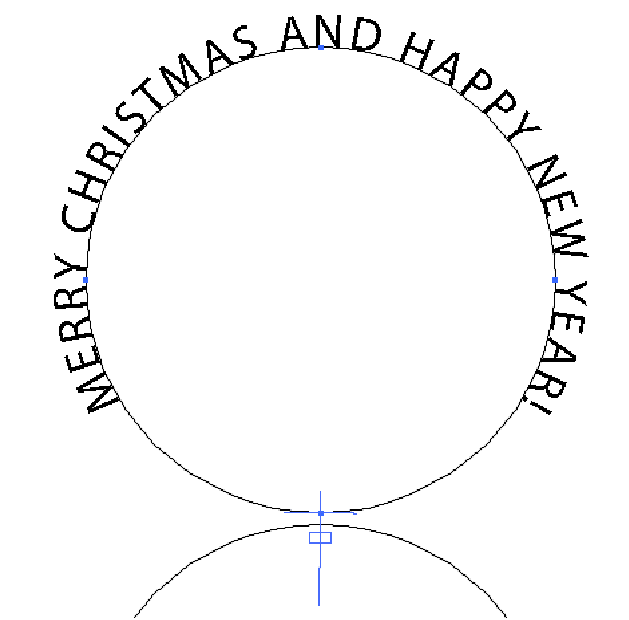
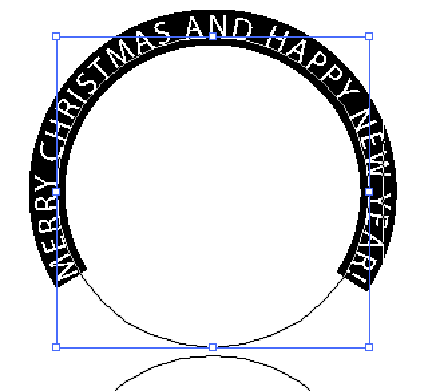
Type in your text. When you see the little red + this means that your text is overset. Overset text just means it’s not all fitting on your path. To expand your path, drag the 9 and 3 o’clock handles downward until they meet at 6 o’clock. The handles are the lines, NOT the little boxes at 3 and 9. If your text is still not all fitting you’ll need to either decrease the amount of text or its point size.
MAXIMIZE YOUR TEXT PATH.
Here we see both text path handles at 6 o’clock. Next we need to bring the text inside the circle, instead of sitting on the outside of the path.
HIGHLIGHT YOUR TEXT.
Click and drag with the type tool (or triple-click with the type tool inserted in the text) to highlight your text.
APPLY A NEGATIVE BASELINE SHIFT
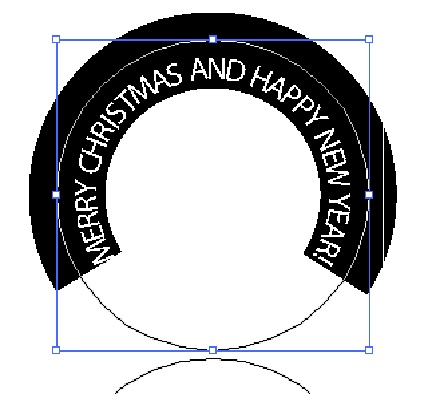
Go to the Character panel and apply a negative baseline shift to move the text down from its default baseline position. This will move the text from the outside to the inside of your circle. Here we used a negative baseline shift value of -15 points.
YOUR TEXT IS NO INSIDE THE ROUND LABEL.
Here we see the result of a -15 point baseline shift on our text. In the next step we’ll space out our text to better fill the entire circle.
ADJUST YOUR TEXT TO FIT.
Here we’ve changed the tracking value of our text (tracking is the amount of space between a range of text characters) from 100% (default) to 380%. Feel free to play around with these values until you get something you like. Try different points sizes, colors, and fonts, too.
OUR TEXT NO FITS
This figure shows the result of increasing our text tracking to 380%. Click off your text now to deselect. In the next step we’ll add a color fill to our circle.
FILL A CIRCLE WITH COLOR.
While still in Outline view, select another circle on your page with the black selection arrow. Then go to View > Preview. Now we’ll be able to see when we choose a nice green fill for our circle. Once you’re happy with your color choice, return to Outline view (Object > Outline). Choose Edit > Copy and then Edit > Paste. Drag the pasted copy of the green circle on top of the circle with your text on a path.
SEND THE COLORED LABEL BEHIND THE TEXT
With your colored circle selected, send it behind your text by choosing Object > Arrange > Send to Back.
ENLARGE THE COLORED CIRCLE.
To avoid any possibility of printer misregistration, we want to increase the size of our colored circle by 5%. Select the circle and open the Transform panel (Window > Transform). First click the little chain icon to lock the width to the height. Next, click the center of the transform proxy (the little nine square icon on the left side of the panel). Make sure you see a black square in the center, indicating that your circle will increase from the center point outward. In the width field highlight the existing value of 1.625 in and type in 105%. Hit Return or Enter on your keyboard to bump the circle size up 5%.
HERE IS OUR LABEL SO FAR.
After bumping up our colored background 5% our label looks like this.
ADD ADDITIONAL ART.
 Switch back to Preview mode (View > Preview) and have a look at your label. Add any additional art to its center as seen here. Once satisfied with your label we’re ready to proceed to final step of duplicating it for the entire sheet of labels.
GROUP YOUR LABEL ARTWORK
Return to Outline mode (View > Outline). Select both circles (the original and the colored 5% larger circle, the text, and any additional art and choose Object > Group.
OPEN THE TRANSFORM WINDOW
Choose Effect > Distort & Transform > Transform…
SET THE TRANSOFORM EFFECT VALUES
For our specific label I’ve set the amount of copies to 3 and the Move Horizontal value to 51.15 mm. I changed from inches to millimeters in Preferences > Units > General because millimeter units are much smaller and more precise than inches. Click OK to accept.
TRANSOFRM THE LABEL ART VERTICALLY.
Go back and choose Effects > Transform. Illustrator will ask if you want to apply another instance of the Transform effect. Click Apply New Effect, as seen here.
SET THE VERTICAL VALUE TO 42.5 mm.
Turn on Preview and set the Move Vertical value to 42.5 mm. Then click OK.
Enjoy the result!
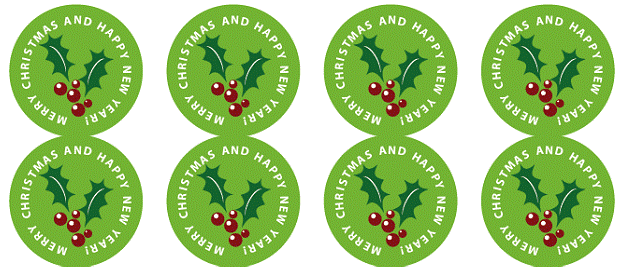
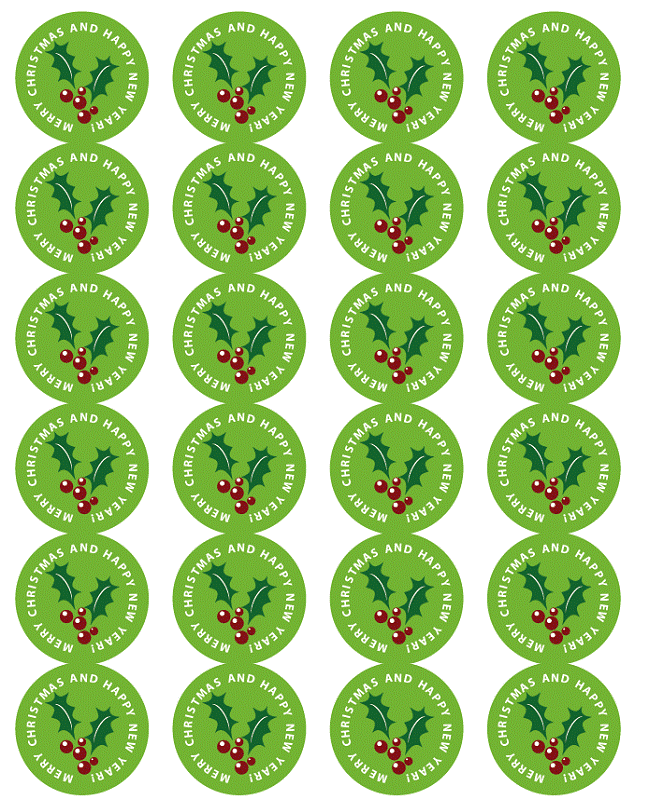
Your finished page of labels should look like this! Note how by changing any one attribute of the original top left label (like the fill color, for example) all the other labels update accordingly. Save your work and print your new labels!
DOWNLOAD: ROUND LABELS WITH ILLUSTRAOR IN PDF
By Scott Citron, (Adobe Certified Instructor, AI/PS/ID/LR/IC)







Just want to say thank you so much for all these free printables and this tutorial as well. I love your blog!
des explications claires : merci de partager vos connaissances !…
yes, thx for this!
I really like how you shared your process of creating a round labels with Illustrator!