
Whether you’re in business or school, outlines can be an essential part of your writing. You may plan a longer piece of writing in one, or use one as an executive summary. Either way, you should find the Outline Numbering dialog in Writer’s Tool menu useful. However, it requires some setup before it is ready to use.
Several versions ago, I would have suggested the second option of creating the list styles that you need, then attaching them to paragraph styles, using the Number tab. Now, you can still take this option, but, if you do, you must start by creating your own styles for each outlining level first.
The reason for this extra work is that, in recent versions of LibreOffice the ability to attach list styles to Headings 1-10 paragraph styles has been disabled. Presumably, this change was made to avoid confusion with the Outline Numbering dialog. However, the change means that this second option now requires additional work to obtain the same results that you can get much more easily with Outline Numbering. This second option is much better kept for lists within the text of a document, which is what it is designed for.
Writer’s Outline Numbering Tool
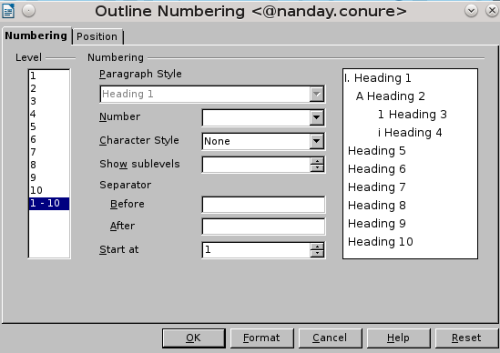
Outline Number is available from the Tool menu in Writer. You can configure each level in the outline separately, but start by setting up the format in all levels by selecting 1-10 in the Level pane on the left.
By default, the numbering uses the same formatting as the text. However, if you choose, you can create a separate character style for the numbers – perhaps making them larger than the text, or in a different color or font — and apply it in the Character Style field on the Numbering tab.
You may also want to add a separator before and/or after the numbers. This separator will divide both the numbering from the text, and the numbering of each sub-level if it is displayed. Typical separators include adding “Step#” before each number, or a period afterward. The After separator field can also include spaces so that the text is not right against the number, and so that multi-digit numbers do not offset the text. However, that is more elegantly accomplished using the settings on the Position tab.
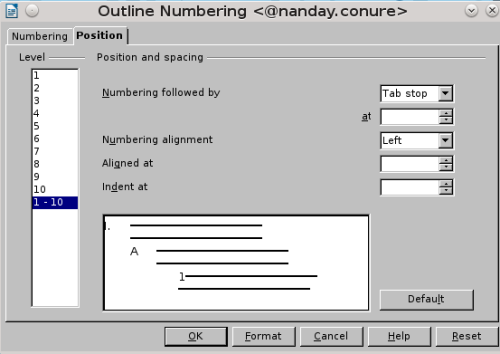
On the Position tab, you can set the numbering to be followed by a space or – better yet — a tab stop at the distance that you specify. Set the Indent field to the same distance as the tab stop, and any second or following line will be aligned to the first, with the number clearly visible and separate from the accompanying text. You can ignore the Numbering alignment field altogether, since it has only small affects on positioning.
When you have finished this common formatting, you can go back and select each level you are likely to use — probably, no more than three or four — and give it any unique formatting. Each sublevel corresponds to the same Heading number, sublevel 4, for example, matching with Heading 4. Although other paragraph styles are listed in the drop-down menu, in the latest versions of LibreOffice, you can only use Heading styles with Outline Numbering.
Probably, you will want to choose a different Number style for each level on the Numbering tab. You can also choose how many levels display in the numbering using the Show sublevels field on the Numbering tab. Set Show sublevels to 1 on the second level, and only the numbering for that level shows – for instance, A. However, change the setting to 2, and I.A displays instead.
Probably, too, you will want to indent each level more than the level above it, using the Aligned at field on the Position tab. A well-formatted choice is to have each sub-level’s number positioned where the text of the level above it begins (that is, the sub-level’s Aligned field equals the tab stop on the level above).
As you adjust these settings, you can use the preview on the Position tab. You may prefer to do a trial outline in the editing window, although constantly reopening the dialog gets tiresome.
Whatever your preferences, your next step is to set all the Headings paragraph styles you are using so that each is followed by a paragraph in the same style, or else in the next sub-level. With this step, Outline Numbering is ready for use.
Working with Outline Numbering
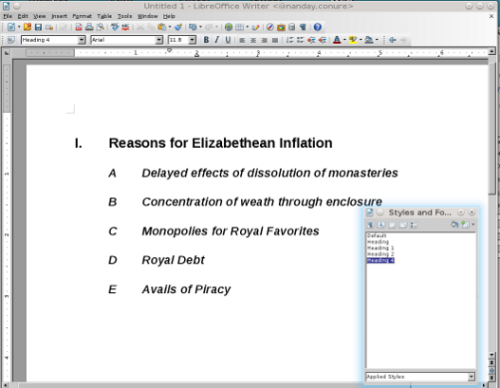
As you work on the outline, press F11 so that the Styles and Formatting window opens, and you can easily change paragraph styles with the mouse. You can also use the Tab key to demote automatically a paragraph in the outline, or Shift+Tab to promote it.
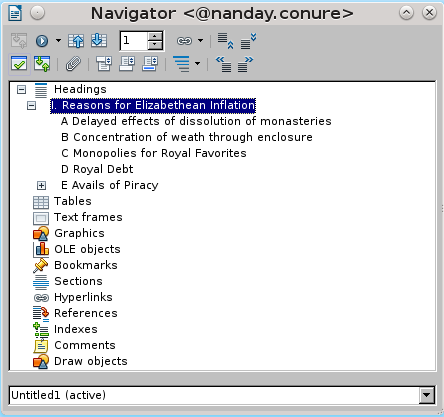
Even better, press F5 to open the Navigator. The Navigator’s Heading section displays the outline levels defined in Outline Numbering in a tree that you can collapse for easier reading. Using the tools in the menu, you can also change the level for each paragraph, and reposition it in the document. Should the navigator become too small for you to easily see your outline, drag on its sides or corners to enlarge the window.
As you can see, preparing Outline Numbering for your use takes a few minutes – a few minutes that you probably don’t want to go through each time you want to create an outline.
To avoid this drudgery, make sure that, as soon as you have set up Outline Numbering to your preference, that you select File -> Template -> Save to store to save the layout as a template under a name like Outline. The next time you need to create an outline, select File -> New -> Templates and Document and open a new copy of the Outline template, all ready for you to add content.
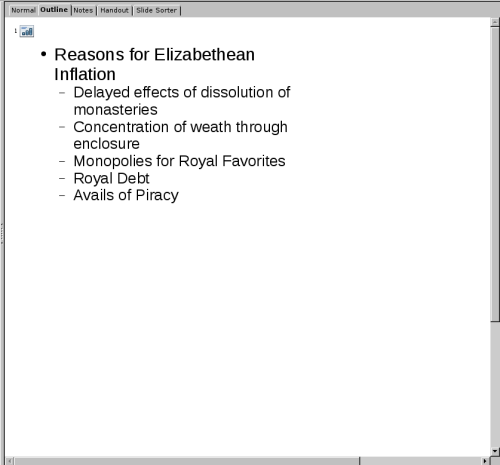
Alternatively, you could open Impress and select View -> Outline while on a slide designed to include bullet points. Impress’s Outline view is designed, of course, for planning slide shows but there is no reason you can’t use it for text documents if you choose. Although it has fewer tools than Writer’s Outline Numbering, the size of the text makes Impress’ Outline view easy to work with.
However, once Outline Numbering is set up, you will find it easy to learn, especially with Navigator open. Take the time to prepare it, and you’ll have a powerful tool ready for the next time that you need it.
BY BRUCE BYFIELD

Pingback: The Document Foundation Turns Two | PHP World
Pingback: Links 30/9/2012: Slackware 14.0 is Out | Techrights