
Many users of LibreOffice and OpenOffice.org are familiar with paragraph and character styles. By contrast, page styles are less familiar. However, if you take the time to set up page styles once in a template, the effort can automate your formatting for years in dozens of documents.
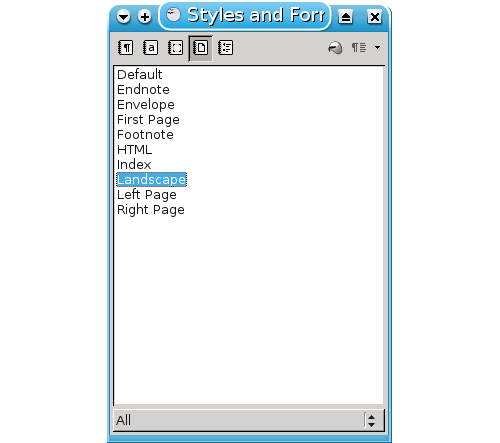
You’ll find page styles in the same place as the rest of the styles, in the Styles and Formatting floating window available by selecting Format -> Styles and Formatting in the menu or pressing the F11 key. It’s the fourth button from the left in the floating window, between Frame and List styles, the other two less commonly used types of styles.
Styles and formating
Looking at the pre-defined page styles, you’ll get a sense of how you can use them. Some, like Envelope and Landscape, are intended for a particular formatting. Others are for pages that often have their own formatting, such as Endnote and Index — for example, although the pre-defined styles leave the Index page style unmodified, you might want give it two or three columns, because index entries often take up very little space. However, the page styles you usually want to pay the most attention to are the Left Page, Right Page, and First Page styles.
Although some of the formatting details are worth thinking about, setting up these three styles so that they interact the way they should is by far the most important part of knowing how to use page styles (I’m assuming that you leave the Default page style unmodified so you can quickly remove formatting in case of trouble).
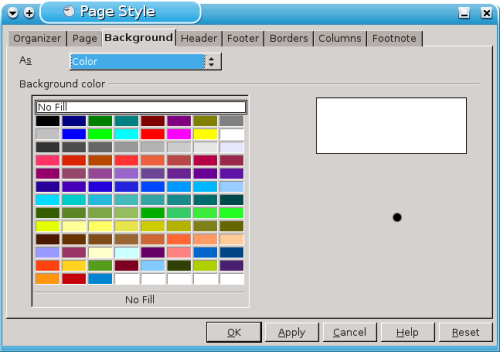
A Quick Survey of Formatting Options Right-click, and you can modify the currently selected page style or else create a new style based on the current one. For some reason, unlike a new paragraph or character style, a new page style does not remain linked with its parent style, changing when the parent does, but creating a new style from an existing one can still save you time. Of the formatting tabs for each page style, the least important is Background. Most users simply leave the setting at the default white.
background-tab
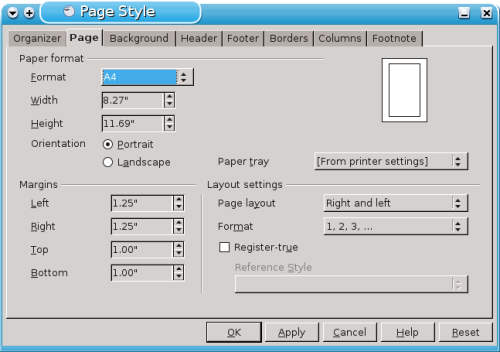
By contrast, the Page tab is worth spending some time over. There, you can set the default page dimensions, either by selecting a common paper type, or by defining the width and height individually. You can also set the page orientation to either Portrait (taller than wide) or Landscape (wider than tall), and specify the printer paper tray to use, over-riding any printer settings. Yet another useful setting is Register True, which gives the same number of lines per page based on a particular style, and can make reading double-sided printing easier.
page-tab
However, the most important setting on the Page tab is the margins. You need to remember that margins are calculated from the top of the header and bottom of the footer, and that you need an extra two centimeters or so on the inside margin if the printed document will be bound. The easiest way to set an inside margin is to set it up for a right page, then select Page Layout -> Mirrored from the bottom right pane of the tab. Change the view so you can see a left and right page side by side in the editing window, and you’ll see that left pages flip the left and right margins you set on the right page to provide uniform inside and outside margins.
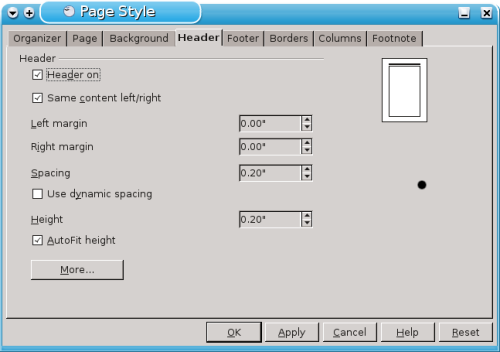
The Header and Footer tabs, share the same options, differing only in what they apply to. Decide which, if either, is needed for your document, and turn it on. You can mirror left and right headers or footers exactly as you did margins. You can also set the Spacing between the header or footer and the main text frame, as well as its Height, specifying an exact height or having the height automatically adjust as you add content. Usually, specfying a height is the best choice, because it helps you keep control of the formatting.
header-tab 1
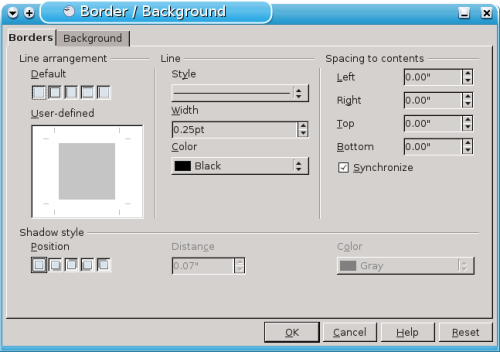
Press the More button on the Header and Footer tab, and you can choose some of the more common formats for separating headers and footers from the rest of the page. Usually, the thinnest possible solid black line between the header or footer is all that you need. Much the same options are available for the entire page on the Borders tab, but a border is generally useful only if you are creating a sidebar for information, or else a standard frame for a page-sized picture.
header-tab 2
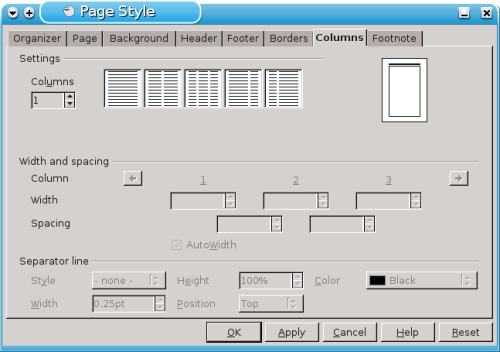
On the Columns tab, you can either set the number and width of columns, as well as the space between columns automatically, or else de-select Autowidth and adjust these details for yourself. Often, de-selecting Autowidth is the most useful choice, simply because the defaults don’t leave much spacing and can result in a cramped look. You also have the option of adding a separator line between columns, but if that seems necessary, you should reconsider the spacing — and, perhaps, the size of the basic font for the text.
columns-tab
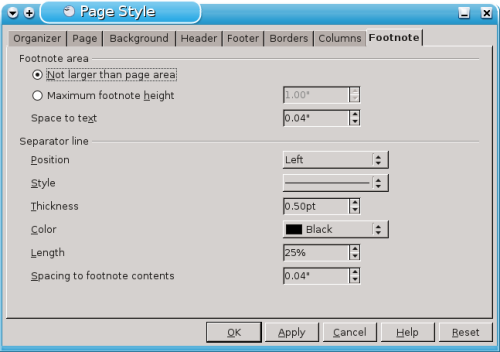
The last formatting tab is for Footnote options. By default, Not larger than page area is selected, which means that no footnote will every occupy a single page, even if it is long enough to do so. Most typographers prefer this option, even if a page has only a few lines of text and the rest is footnote, so that readers can follow the text before the footnote without any interruption of the continuity. In fact, many prefer to set a maximum height, so that no single footnote overoverwhelms the rest of the document.
footnote-tab
The rest of the Footnote tab is devoted to the line separating footnotes from the main text. As with headers and footers, you can’t go wrong with the thinnest line possible, and a generous amount of separation — the equivalent of two or three lines of text will usually do. Organizing the basic styles Page formatting matters, but what really matters is the relationship between the three main types of pages.
Generally, the easiest way to design pages is to design a right page, then a left page that is a mirror of the right one. To avoid problems, you should generally turn off all settings to mirror pages or headings and footers, on the grounds that they can cause conflicts with your own editing. Generally, you will only want to use the mirroring options for quick formatting when you don’t have a template already made that fits your needs.
For many documents, a right and a left page are all you need. However, if you want a more formal document, you should also set up a First Page style. It should be based on the Right Page style, because the First Page of a bound book is almost always a right page. However, the First Page Style differs from the Right Page style in several ways.
To help readers find the start of new chapters or sections, a First Page usually has a chapter number and/or title, and only half a page or so of text. Assuming you want all three, then create a Chapter Number paragraph style with a List Style attached to it. Set the Chapter Number paragraph style to be followed by the Title pagraph style, and the Title paragraph style by the Body Text style (or whatever you are using for the main text). By adjusting the font size and spacing between lines, you can soon set up a First Page that can’t be mistaken for anything else.
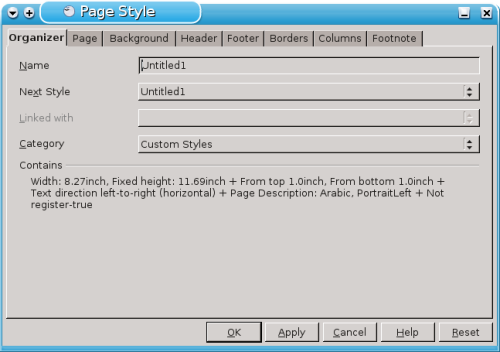
If the chapter number and title aren’t needed, create a paragraph style called something like Chapter Start, based on Body Text and followed by Body Text. Set Chapter Start so that it has 8-12 centimeters above it, and starts halfway or more down the page. When you have all three basic pages ready, open the Organizer tab of each. Set the First Page so that the next style is Left Page. Set the Left Page so it is followed by Right Page, and the Right Page so it is followed by Left Page.
organizer-tab
If you need to insert another page style — say, a Landscape page for a picture — place the cursor on the page and select the other style. Should you run into formatting problems, use Insert -> Manual Break -> Page Break to isolate the pages with the non-standard style from the rest of the document. Exceptions and templates.
The one feature that Libreoffice / OpenOffice.org page styles lack is the ability to create and define a frame style that will appear on every page that uses a particular style. This feature would be especially useful for logos on first pages. Sometimes, you can work around this lack by making a very large header or footer, since the content of headers and footers is repeated on every page. However, this workaround gives you limited choices for positioning, and won’t always work. However, this is the one restriction on an otherwise versatile feature.
If you set up page styles as I described and save the resulting file as a template, you’ll have a structure that willwork on mot documents. If you need to insert another page style — say, a Landscape page for a picture — place the cursor on the page and select the other style. Should you run into formatting problems, use Insert -> Manual Break -> Page Break to isolate the pages with the non-standard style from the rest of the document.
Page styles take time to organize. However, that initial effort will be repaid over and over in the time you save when writing similar documents. Its page styles, as much as any other feature, that makes Libreoffice / OpenOffice.org more of a layout applications than a mere word processor.
BY BRUCE BYFIELD

Too complicated to use : see how long is your post just to explain this feature 🙁
I tried to use it, notably to do covert page without header/footer and page numbering ( and trying to make page numbering start _after_ this page ) and most of the time it didn’t work.
What we need is :
– possibility to apply a page style by clicking on a page -> right click -> apply page style
– page style preview
– when changing a page style, it should be isolated automatically by default, or we should do like Impress : apply only to this page, or apply to all
IMHO Writer page style should really use more code/ideas/concept from Impress Slides styles
all the paragraph styles that
come with writer how do we know
what they are for. If you are going to provide a bunch of styles it would be helpul to know what they are with a preview and maybe a short description what they were intended for. Love libre office.
In Libra Office, when I apply a page style to a particular page that has been formed by a page break, that style is applied to the entire document. It seems to not be possible to have different pages with different styles. I’m using Libra Office on a Mac. I wonder if I’m doing something wrong or if it is a function of this being a semi-broken version of the software.
Time to fire up the Linux box and see if it works there!
I found that when apply style to the page in style window, you need to do double click, not just single click.