Like any other modern GNU/Linux distribution, Ubuntu has no shortages of software for printing labels. Many users content themselves with the label and mail merge features in OpenOffice.org Writer or in Abiword or KOffice. All these solutions will do a basic job, especially with text. But what if you want elaborate formatting or graphics with your labels? What if you want a smaller, dedicated program that is quicker to load than a complete word processor? In these cases, you should consider turning to gLabels instead.

As you might guess by the name, gLabels is a program designed to run on the GNOME desktop. Specifically, it is designed for GNOME 2.16 or later, which means that it should work on any version of GNOME released in the last four or five years.
By Bruce Byfield
Although gLabels is not part of the default Ubuntu installation, it is included in Ubuntu’s repositories, where, currently, you can get version 2.2.3-0. However, if you want the newly available 2.2.4 version, you can compile it from source (after making sure that you have the dependencies listed on the project’s download page), or obtain glabels and glabels-data, the two packages you require from the Getdeb site. The packages are organized according to the Ubuntu releases they are intended for. However, whichever set you use, you can download them and install them with dpkg, starting with gLabels-data to avoid dependency problems.
Designing a basic label
gLabels opens on a window for designing. However, you will probably want to start using gLabels by clicking the New button and opening the New Label or Card window. This window is divided into two tabs: Recent templates and Search all templates. The Search all templates contains listings for every major label brand from Agipa and Avery to Worldlabel and Zweckform — over forty-five overall. You can also search by paper size and category, which ranges from address to CD labels. By mixing these three search categories, you should have few troubles finding a match for the label pages to which you plan to print. Select the label page from your search results, and you are ready to start designing your labels — although you may choose first to orient your labels on an angle that you define, if you feel like being original.

Should you be lucky and not find the label template that you need, you can design your own using the wizard started by selecting File -> Template Designer. This wizard is useful mostly when you have a paper type not defined in gLabels, although you could use it with a label page that is undivided, and use scissors or a cutting board as well. The wizard steps you through identifying the brand and part number of your paper as well as the page’s width and height, the shape of your labels, the width and margins of each individual label, and the layout of labels on the page. Click the Apply button, and the new template is now listed when you open the New Label or Card window.
When you select your template, you return to the design window. It now shows a single label, which will be replicated on all the other labels on the page. By default, the single label shows a grid and a red line indicating the margin, but you can remove both from the View menu.
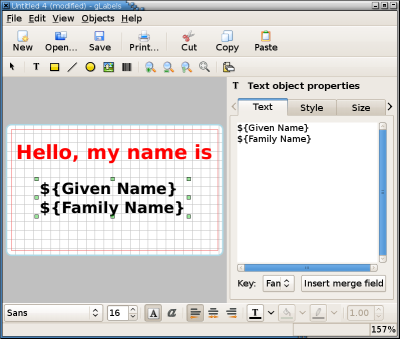
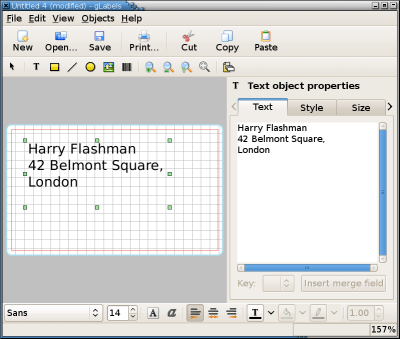
From the design window, you can text in any font, size, color or weight you choose, as well as basic shape primitives like lines and rectangles using the toolbars. If you want more elaborate graphics, such as an image or a barcode, you can set them the Objects -> Create sub-menu.Click on any object, whether it is a piece of text or a barcode, and details about its formatting appear in the object properties pane to the right of the label design. These details can be edited as much or as little as you choose.
While you are working, you the Zoom modes in the View mode to zoom in and out, depending on the detail of the work you are doing. You may also want to go to File -> Print -> Print Preview to see how the finished work looks in a PDF file. These points aside, the design window and its toolbars should be easy to learn for anyone with a rudimentary knowledge of desktop computing.
Adding a mail merge
“Mail merge” is the name given to printing that involves printing the same kind of information but with different specifics on each label. You might, for example, design a label in which the first line had a field for the name of a person, and the other lines fields for the details of their address. Instead of typing all this information individually, you could link to a source document with the information arranged in the same way, and have all the labels filled in automatically when you print.

Mail merge source files in gLabels are limited to Evolution address books, files containing VCards and text files with comma, colon and tab delimiters (that is, files in which the columns of a spreadsheet or the fields of a database are marked by a piece of punctuation or spacing). If the information you need to use is not contained in an Evolution address book, then probably your best source is a copy of a spreadsheet saved to a file that uses commas as delimiters. If you select File -> Save As, this option will usually be listed as CSV (comma-separated values), Text CSV, or something similar, regardless of the spreadsheet application you are using.
The first step in a mail merge is to select the source file via Objects -> Merge Properties. From here, you select the format for the document and its location. The information in the source document then displays in the Record selection/preview pane at the bottom of the window. Select the records you want to use, and click the OK button.
Next, you have to add merge fields to the label design. To perform this task, add a text object where you want the field to go. Select a key — that is, a column or field from the source document — at the bottom of the page, then click the Insert merge field button. If the key is called Family Name, then the merge field will appear as ${Family Name}. Add text around the merge field as needed. As you can see if you select File -> Print -> Print Preview, the dollar sign and curly brackets are non-printing characters that exist to designate a merge field, and are not printed.
Printing Labels
File -> Print in gLabels offers many more options than just Print Preview. From the General tab, you select the printer to use, and the range of pages, number of copies, and order in which to print. The Page Setup tab gives you options about which pages to print and the paper tray to use, and the Image Quality tab has a setting for printing resolution. If you are on a network or sharing a printer, you can set the priority of your printing from the Job tab, while in the Advanced file, you can use Ghostscript to convert the file to postscript before it is printed. However, most users on most systems are unlikely to use any of these settings regularly except those on the General tab.
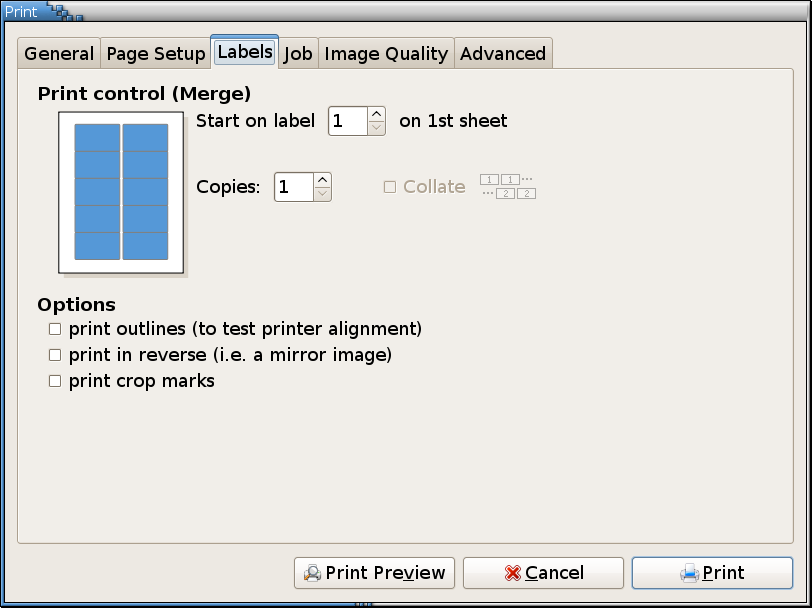
By contrast, the Labels tab gives you control over how the single label you designed is used as the basis for all the labels you want. In a simple label — one without mail merges — you can choose the number of sheets to use, and how many labels on the sheet to use. You also have the option of printing in outline as a quick test, or printing crop marks, or cutting guidelines, which can be useful if you are using a custom template without pre-cut labels.

If you are doing a mail merge, you have the same options, but you can choose which label on the paper to start printing from, and how multiple copies are positioned on the page.
Conclusion
The main advantage of gLabels is that you have more control over the label design than in applications like OpenOffice.org Writer. If you want more than basic printing in your labels, this advantage may be enough to overcome any misgivings you might have about using delimited text files or inserting merge fields with slightly arcane symbols.
Fortunately, this is free software that we are talking about. Installing gLabels takes less than two minutes, and you can take as long as you want to explore it. If, in the end, you decide against it, then deletion is even quicker than installation.
However, you may find gLabels worth keeping around. Unlike a word processor, gLabels is designed to do only one task. Some aspects of gLabels may take a little trial and error and consultation with a help file, but, once you learn gLabels, I think you will find that specialization has its advantages. gLabels may do only one thing, but it does that one thing very well.
By Bruce Byfield
![]()

Visit Worldlabel.com and check out the selection of Labels for laser and inkjet printers


Hi,
I really appreciated for gLabels method as it has better commend over the label design than in applications like OpenOffice.org Writer. So I would love to go with it. But Openoffice.org has a facilitated to print label with easy mounting tray too which may be cost-effective than gLabels. Anyway thanks for contributing new technology to print media. 🙂
Pingback: Getting started with gLabels: Labels & Cards GNU/Linux | Worldlabel Blog
Great application, exactly what I was looking for, and far better than trying to print labels in open office.
GLabels rocks.
Pingback: Cara Mudah Mencetak Label « esetianto
i only have labels in mm vs. in. how do i get around that? i dont see any option where i can change to mm. help!
Pingback: Ubuntu/Linux Compatible Label Printers - Call The Ninja Computer Repair Blog