
Following is an excellent two part series on gLabels by Nathan Willis: Getting started with gLabels and Advanced usage with gLabels.
Labels and Cards with gLabels (Part One)
In the world of label creation software for Linux, gLabels is the long-standing market leader. It offers a convenient graphical interface in which you can design labels with the same tools you are used to finding in image editing software, but it also supports business-friendly advanced features like “mail merge” and barcode generation. In addition to that, its focus on label creation offers some advantages in printing over general office or graphics alternatives, like simple control over printing partial sheets.
You can download source code for gLabels from its SourceForge project page, but most Linux distributions include it in their package management systems — the gLabels site maintains a list of such distros on the download page. gLabels uses GTK and is designed to work with the GNOME desktop environment, but it runs just as well under KDE.
When you first launch gLabels, most of the main window will be grayed-out; to get started you must first create a new label file. Click on the “New” icon on the toolbar. This opens the template selector, from which you can choose the type of media you want to work with — everything from address labels to CD labels to round labels to full-sheets to business cards are supported; gLabels includes hundreds of templates. To simplify selecting the right template, you can sort by brand name, page size, and media category using drop-down boxes at the top of the window.
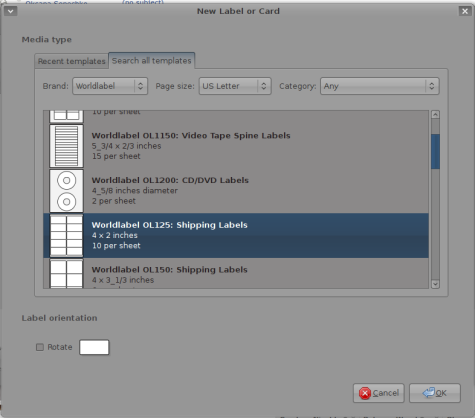
“gLabels starts off a new session by asking you to choose a template.”
gLabels remembers your choices, so in subsequent sessions you can save some time by selecting often-used templates from the “Recent templates” tab instead of searching through the complete library. Also from this window you can click on the “Rotate” checkbox to open the label designer with the selected label rotated 90%. This is strictly for your convenience in designing the layout; gLabels does not require you to physically rotate the page in the printer when you finish — the program handles that automatically. If you’re not sure which orientation you need, there is a small preview displayed by the checkbox. You’ll notice that gLabels is smart enough to deactivate this checkbox if you choose a round or perfectly square label!
Designing
When you’ve found the right template, click “OK” and gLabels will open a new label in the label design window. This window has a drawing area on the left displaying blank canvas in the shape of the selected label, a properties pane on the right with which you can adjust design elements, and drawing tools above and below.
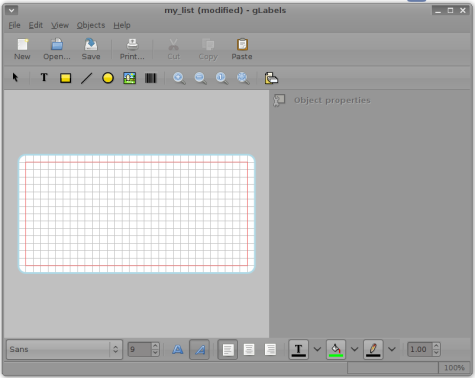
“The main gLabels window.”
Above the drawing area you will find the selection tool, text tool, rectangle, line, and ellipse tools, and the image and barcode tools. These function much like their equivalents in a vector drawing app like Inkscape or Illustrator — you use the object tools to draw content onto the canvas, and the select tool to manipulate objects already in the drawing. Unlike drawing in a raster editor like the Gimp or Photoshop, objects in gLabels are not rendered into a flat “painting” of pixels; they can be moved, edited, or erased at any time.
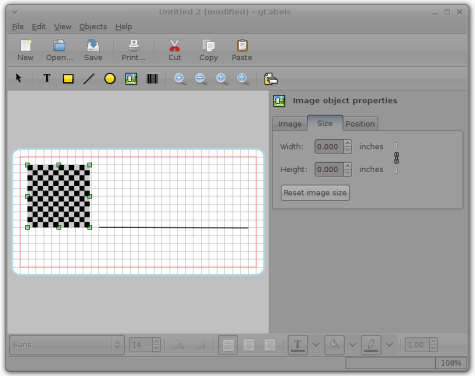
“The properties pane, showing properties for an image object.”
To the right of these drawing tools you will find the zoom controls (in, out, one-to-one or “100%”, and zoom-to-fit) and a button labeled “Edit merge properties.” The latter is for use when configuring a mail merge, and is complex enough to warrant a section of its own. The zoom tools, like the drawing tools, work just like those in any image editor.
Below the drawing area are controls for setting additional drawing properties: the font, size, weight, slant, and alignment of text elements, the color of text, line, and object fill, and the line weight. When no object in the drawing area is selected, changing any one of these settings changes its default for future objects. When you select a rectangle, on the other hand, the properties update to show its current line weight and color scheme — that way, you can manipulate all objects’ properties individually. A property that does not apply to the selected object (such as text settings for a rectangle or ellipse) is automatically grayed-out.
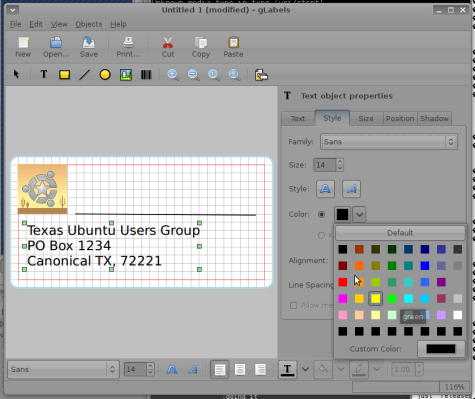
“The properties pane, showing options for text editing.”
The drawing area itself shows the outline of the current label, with a red border inside the edge marking a “safe area” into to which all critical content should fit, to account for printer variation and minor differences in label perforation. This border is actually part of the label template itself, so some templates may also include additional markup lines to help with alignment. The canvas also shows a gray grid underneath all drawing objects; this is strictly for visual alignment — gLabels does not “snap” to this grid. You can turn off grid display from the “View” menu.
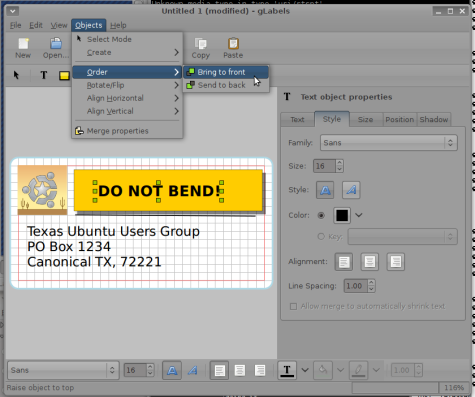
“Additional controls, such as the z-ordering of objects, are not found in the toolbar.”
Working with objects and object properties
As you draw and manipulate objects in your design, the “properties” panel on the right changes to give you access to some more advanced controls for each object type. When inserting an image, for example, the properties panel is where you select the image file to load, and it allows you to adjust the scale, proportion, and placement of the image on the canvas with a greater degree of accuracy than the mouse can provide. The geometric objects (rectangle, line, and ellipse) have line width, color, and fill color controls in addition to size and position, and an optional “shadow” special effect over which you can control vertical and horizontal offset, shadow color, and opacity.
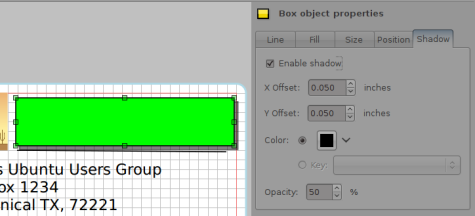
“The shadow feature is a built-in special effect.”
Text objects have their own set of properties, naturally — on top of color, size, position, and shadow effect. The “Style” tab allows you to select the font, size, weight and slant, alignment, and line spacing. You type the actual text to be rendered in the “Text” tab, which allows for more accuracy than trying to type directly in the drawing area, particularly when there are multiple layers and objects. Although it is probably clear, it bears mentioning that you control the properties of every text object you create individually — this gives you a lot of freedom, but it also limits you to a single text style for each object. If you need to italicize just one word, you will have to create it in a text object of its own.
You can place text, graphics, and other objects anywhere on the drawing area, including partially or completely off of the label itself. As you add elements to the design, the newest element is always placed on top of the older elements. You can change this “z-ordering” with the “Bring to front” and “Send to back” commands found in the “Objects” menu.
There you will find other object-manipulation commands as well; you can also rotate any object by 90 degrees in either direction, or flip it vertically or horizontally. Finally, you can select multiple objects (by holding down the Control key as you click on them) and align them vertically or horizontally, measuring from either edge or the center. You can also center any object on the label.
Printing your work
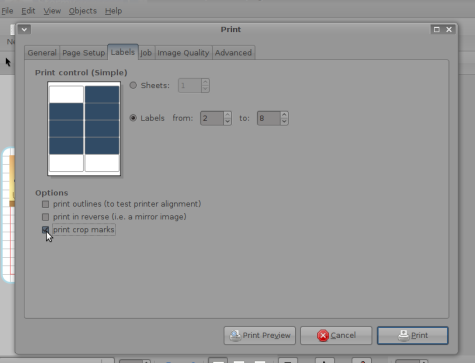
When you are ready to print your final product, choose “Print” from the File menu. You will notice that gLabels adds a “Labels” tab to the standard GNOME print dialog, with which you can better control printer output in some label-specific ways.
“gLabels adds a tab to the GNOME print dialog with special options, like partial-page-printing.”
For example, you can choose the “print outlines” option, and print test output on a standard sheet of paper. This way you can check the alignment of your printer by comparing the test page against an actual sheet of labels, without sacrificing a sheet.
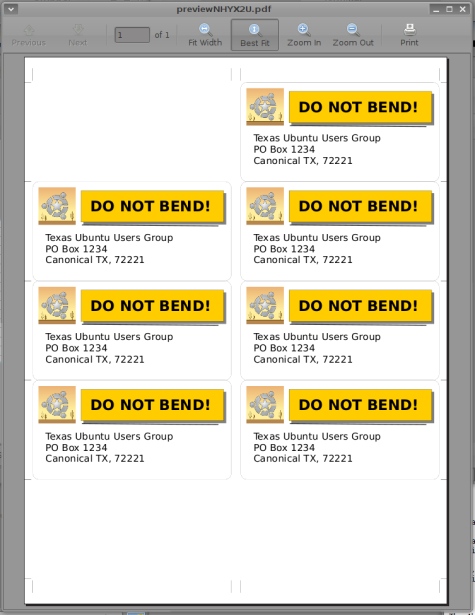
You can also choose the “print crop marks” option, which will print light lines aligned to the outside of the template’s labels. Using these you can cut your sheets up, even with a paper cutter, without fear of slicing through your output. There are always occasions where you might want to cut up a sheet of labels, but this option is primarily of value when designing business cards. The crop marks let you create clean, perfectly-aligned cards without resorting to outlines or other tricks, and best of all: you don’t have to worry about aligning the crop marks; gLabels does it for you.
“gLabels allows you to view a preview of your printout to check for accuracy.”
The third option is “print in reverse,” which prints a mirror-image of the design. This option is for use with labels that will be affixed to glass, such as inside a window, but need to be read from the outside. Here again, you could manually achieve the same affect — gLabels lets you flip any object in the drawing area, remember — but by providing a one-click print-time option instead, gLabels allows you to worry about creating the design you want, not technical issues.
The last option gLabels gives you at the print stage is whether to print an entire page of labels, or just a few. The print dialog includes a preview image of the chosen template, with the labels to be printed highlighted. You can choose to print the entire sheet if necessary, or you can print as few or as many as you want. Just click on the template preview, or use the numeric spin-boxes to select which subset of the full sheet you wish to print, preserving the rest of the page for a different job, perhaps with a completely different design.
Up next: advanced topics
That covers basic gLabels usage: designing labels, using the built-in tools, and printing. Next time we will look into advanced topics that require more space: setting up your label designs for a “mail merge,” working with gLabels’ support for automatic barcode creation, and using the template designed to edit and create your own label templates. Until then, happy labeling!
Read Part 2: Advanced usage with glabels – this covers mail merge, barcode generating and more!
By Nathan Willis

Is there a comparable version that is written in Qt?
Open office has great label support for at least a year.
@Roger Openoffice is an excellent program for making labels. We will be publishing serveral posts on Labels with Openoffice.org very soon.
Pingback: openSUSE Weekly News, Issue 136 is out! | Gnu Architecture
Pingback: openSUSE News
I have made labels using glabels before, but can’t remember how to set it up to print a mailing list of multiple addresses on one sheet.