Category Archives: LibreOffice.org

Adding Graphics to Labels Using Libreoffice

Adding Graphics to Your Labels

When people think of labels, the first thing that comes to mind is lines of text like addresses or tab markers. But these are just the simplest uses for labels. Photos, greeting cards, business cards, inserts for CD jewel cases — all of these can be created with a color printer and a package of labels. And with thermal transfer technologies, the possibilities expand to include everything from printed T-shirts to buttons for political campaigns and causes. All of these and more can be created using LibreOffice to create your own graphics.

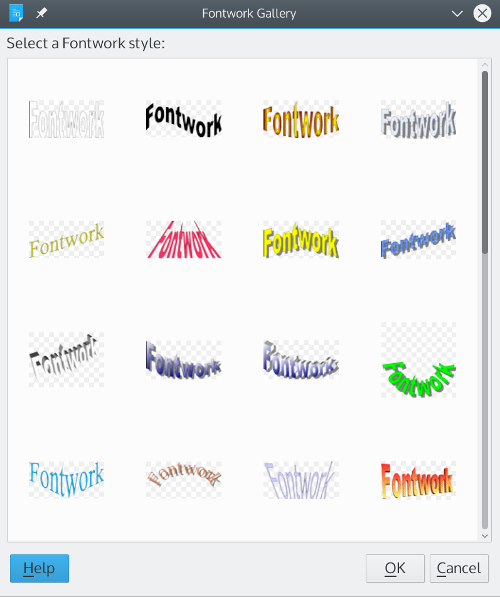
LibreOffice is a complete office suite that is free for the download on Linux, MacOS, and Windows. You can create designs to add to any label in LibreOffice Draw application. You can edit images in LibreOffice’s Draw application, or create your own using Draw’s “primitives” — basic shapes ranging from circles and squares to stars and crosses. Another useful tool is Insert| Fontworks, in which you can arrange text in creative ways, substituting your letters for those in the templates:

A painless way to learn how to design your images is Robin William’s The Non-Designer’s Design Book. Williams (No, not that one) suggests keeping in mind four basic principles for arranging different aspects of your design: alignment, contrast, proximity, and repetition. More than one of these principles can be used at the same time. For example, in the business card below, the lines with contact information are all right aligned, while the company logo and the contact information have contrasting backgrounds:

If your design skills are not up to the task, you can download royalty free images and free fonts from hundreds of Internet sites. Another useful tool to download are dingbat fonts — fonts in which typing a character prints an image instead of a letter or symbol. For example, here is a small image created with a dingbat that consists of whimsical, nursery rhyme characters use with Fontworks:


When you design the images for labels, keep in mind the size of the labels. While it is easier to design at a much larger size than the label itself will use, if you have to shrink down an image, it is going to lose much of the detail. In addition, too much color could reduce the image to a few blobs of color. You should always experiment, but when working with smaller labels, think in terms of simple designs and a few bold colors.

Similarly, remember the background on which the image will be displayed — either its own, or the color of the label. The basic rule for legibility is light colors on a dark background, and dark colors on a background. Most of the time, a background of many different colors will be confusing.


Preparing the Label Sheet

In LibreOffice, a label sheet is created by producing a file for the Writer application with outlines that are equal to the dimension of the label. If your label is a thermal transfer or an unusual size, you will need to measure the size of the label carefully, and then select File | New | Writer Document. Set the page to the same size as the label sheet using Insert | Page. Then add Insert | Frame | Frame and set the frame so that it is the same size as your label(s), and positioned in the same way on the page.

With any luck, LibreOffice may support the manufacturer and type of label you are using. To check, To start preparing labels, start LibreOffice’s Writer word processor and select File | New | Labels. From this window, you can select the label type and how it is fed into your printer. You can also enter any text for your labels, either manual in the empty pane provided, or else from a database (check the online help for how to create and connect to a database.) You do not need to add text, and images will have to be added later, when the label sheet is prepared.


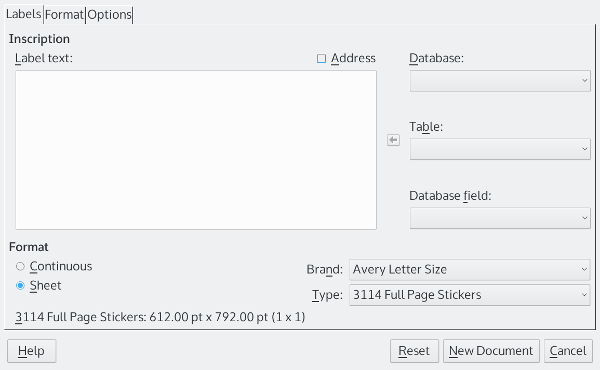
If your label sheet is not supported, you can set Writer to use it on the Options page, where you can enter the size of each label (if each page has more than one) and the spaces between the labels. You can also create a custom label sheet manually from an empty Writer document by measuring the label sheet and by using Insert | Frame | Frame and setting frames so that each the same size as your label(s), and positioned in the same way on the page. Probably, too, you will want to select the frame and right-click on it to make the borders of each frame invisible when you print.

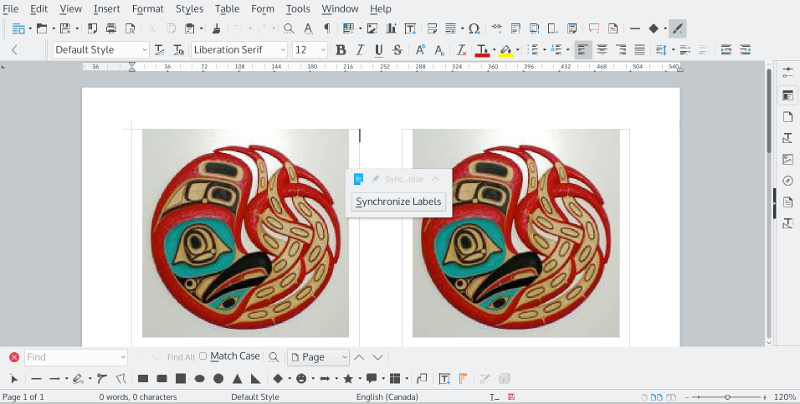
The last step in preparing the label is to select Synchronize contents on the window’s Option tag. This feature sets the resulting file you create so that all changes to the first label on a page can be duplicated on the other labels with a single click.

When you are ready, click the New Document button. Writer will open a new file, showing frames for each label on the sheet and a floating Synchronize Contents button. This button is especially useful for adding images.


Adding Images to Your Labels

If your label is big enough, you can create your image using the Draw toolbar in the file created for printing by LibreOffice. Even then, though, you may find using Draw easier.

If you are using Draw, your last step should be to select all the separate elements by running the mouse cursor around all of them so that their frames and selective points show. By selecting Shape | Group, you can move and resize all the elements as if they were only one.

Then click on the grouped elements and select Position and Size from the right-click menu to reduce the size of the image so that it fits on the label. This step is necessary because if the image is too large for the label, adjusting it can be difficult. When you are ready, you copy and paste the image to the first label on the page. Clicking Synchronize Contents will replicate the first label on all the other labels. You are then ready to print.

A Matter of Practice

Adding images to a label may seem awkward at first, but it is really a matter of practice. After a few tries, you will start to see that LibreOffice’s tools are actually designed to save you effort and frustration. Once you are comfortable with the steps, you will find that, when you go beyond text, labels actually have more possibilities than you originally suspected.

By Bruce Byfield, author of Designing with LibreOffice.org – visit and download the book here

Preparing Labels With Libreoffice Video By Bruce Byfield

How to Prepare Labels with Libreoffice.org by Bruce Byfield.

This tutorial covers using templates, how to import images and use text, in-depth instructions on using mailmerge and more.

For more reading on using labels with Libreoffice:

Creating fancy labels with Libreoffice

Mail merge address labels with Libreoffice

Working with Barcode with Libreoffice/Openoffice

Have more questions about using labels, feel free to visit the forums and engage the community in helping you

Choosing line alignment in LibreOffice

LibreOffice_

The Alignment tab of a LibreOffice paragraph style has four ways of positioning text on a line: Left, Right, Centered, and Justified. In practice, however, Right is used mostly for highly-formatted documents such as brochures, while Centered is mostly reserved for titles and sub-titles. For body text, the choices are usually Justified, in which the left and right sides of the text column align with both the left and right margins, and Left or “ragged right,” in which only the left side of the text column aligns consistently with a margin. Asked to choose between Justified and Left alignments, most users will choose Justified — but the choice is not as simple as you might think.

alignment-tab

Continue reading

Creating Tables of Contents in LibreOffice

In LibreOffice and Apache OpenOffice, tables of contents (ToCs) are grouped with index and bibliographical entries under Insert -> Indexes and Tables. All of them are created with a similar procedure, but the details vary for each case. Tables of contents in particular allow much more options for formatting than are available in MS Office.

The basic steps are easy:

  1. 1. Mark in the text the entries for the table of contents.
  2. 2. Position the table of contents where you want it.
  3. 3. Format the ToC (if necessary)

Continue reading

Outlining in LibreOffice Writer

Whether you’re in business or school, outlines can be an essential part of your writing. You may plan a longer piece of writing in one, or use one as an executive summary. Either way, you should find the Outline Numbering dialog in Writer’s Tool menu useful. However, it requires some setup before it is ready to use.

Several versions ago, I would have suggested the second option of creating the list styles that you need, then attaching them to paragraph styles, using the Number tab. Now, you can still take this option, but, if you do, you must start by creating your own styles for each outlining level first.

The reason for this extra work is that, in recent versions of LibreOffice the ability to attach list styles to Headings 1-10 paragraph styles has been disabled. Presumably, this change was made to avoid confusion with the Outline Numbering dialog. However, the change means that this second option now requires additional work to obtain the same results that you can get much more easily with Outline Numbering. This second option is much better kept for lists within the text of a document, which is what it is designed for.

Continue reading

Seven Reasons for Choosing LibreOffice over Microsoft Office

OK, LibreOffice is free for the download, and you can install it on as many different machines as you choose. But a free price and a free license aren’t much good if the software doesn’t have the features you want.

Happily, that’s usually not a concern with LibreOffice or its predecessor, OpenOffice. Although many people assume that a free application must be inferior to one that they pay for, a comparison of LibreOffice with Microsoft Office (MSO) proves that the opposite is often true. Sometimes, MSO has features that LibreOffice lacks, but, just as often, it’s LibreOffice that has more tools than MSO.

However, unless you’re concerned about a must-have feature, there’s usually no need for a point by point comparison. Focusing on performance and high-level interface choices alone, I can think of at least seven reasons to choose LibreOffice over MS Office:

Continue reading

Working with Barcodes in LibreOffice/OpenOffice.org

Neither LibreOffice or Apache OpenOffice.org installs with the ability to print barcodes. However, if you need barcodes, you have at least three ways to add them to either office suite.

The first — and least elegant — method is to use one of the many dedicated shareware, freeware, or free-licensed applications for printing barcodes and labels.

Continue reading

9 Tricks for Using List Styles in LibreOffice/OpenOffice.org

List styles are an open secret in LibreOffice and OpenOffice.org. If you press the F11 key to open the Styles and Formatting palette, they’re in plain site at the end of the buttons for the five types of style – yet hardly anyone goes beyond their basic use or even uses them at all. However, if you take a closer look, there are all sorts of ingenious uses for list styles.

Like any type of style, lists styles save time. Change the style, and in seconds you change the formatting of every instance that you use the style throughout the document, instead of hunting down each instance and changing it manually.

Continue reading

Page styles in LibreOffice

Many users of LibreOffice and OpenOffice.org are familiar with paragraph and character styles. By contrast, page styles are less familiar. However, if you take the time to set up page styles once in a template, the effort can automate your formatting for years in dozens of documents.

You’ll find page styles in the same place as the rest of the styles, in the Styles and Formatting floating window available by selecting Format -> Styles and Formatting in the menu or pressing the F11 key. It’s the fourth button from the left in the floating window, between Frame and List styles, the other two less commonly used types of styles.

Continue reading

Mail Merge Address Labels in the Excellent Free LibreOffice

We learned how to create fancy return address labels with LibreOffice in our last installment. Today we’re going to tackle mail merge. Mail merge is a powerful, time-saving word processor feature for addressing mass-mailings and form letters. It’s easy but a little weird in LibreOffice, so follow along and learn how to be a mail merge guru.

Address Labels and Form Letters.

If you’re not familiar with LibreOffice, it is a superior offshoot of the popular free office suite OpenOffice. LibreOffice is cross-platform and runs on Linux, Mac, and Windows, and provides a word processor, database, spreadsheet, drawing program, and slideshow creator. With LibreOffice you can create address labels and form letters. It all starts with your database of addresses, and then following the not-very-intuitive steps to merge your addresses into your document. This is not well-documented in the LibreOffice help documents, and if you try to figure it out yourself you’ll get lost. So follow along and learn the right way– it’s an easy few steps when you know how. If you don’t have an address database, you don’t have to be a guru to create one because we’ll show how to do that too.

Continue reading