Sometimes alphanumeric text simply won’t cut it, and you need a bar code — mailing labels, security badges, inventory tracking, perhaps even URL-encoding for mobile phones. With KBarcode, you can use a simple desktop application to both generate and print several dozen different barcode types, on any sort of physical media.
Like you might guess, KBarcode is a Qt-and-KDE program, but it supports several different backends for generating the wide variety of barcode formats it supports. The backends include GNU Barcode, Barcode Writer in Pure Postscript, PDF417 Encode (which supports the PDF417 stacked barcode format, and has no relation to Adobe’s Portable Document Format), and the commercial (and proprietary) TBarcode from tec-it.com.
Between them, these backends support well over fifty different formats, from commercial standards like UPC and ISBN to postal standards like USPS OneCode to general-purpose formats like Code 39 and Code 128. TBarcode even adds support for a few 2-D formats, like Data matrix and QR Code. For those who are not familiar with the various barcode encoding schemes, the Barcode Writer in Pure Postscript site links to Wikipedia entries with background information on most of them.
KBarcode is packaged by most of the leading desktop Linux distributions, so it can usually be installed through the system package manager. It does have some KDE dependencies, however, so if you are running a GNOME-based distro you may find a longer list of packages needing to be installed to satisfy them. The only out-of-the-ordinary requirement is on an external MySQL database — this, too, should be easily installable, but if you have never before set up MySQL on the machine in question, you are in for a few extra steps.
You can also download the packages or source code tarballs from the project’s Web site. The only documentation for the application is there as well, as a downloadable PDF manual. You can, however, pull up an HTML file installed by KBarcode in /usr/share/docs that explains a few of the supported barcode formats — their character sets, maximum length, checksum support, etc. It is found in the Help menu under “Barcode Help.”
Generating barcodes
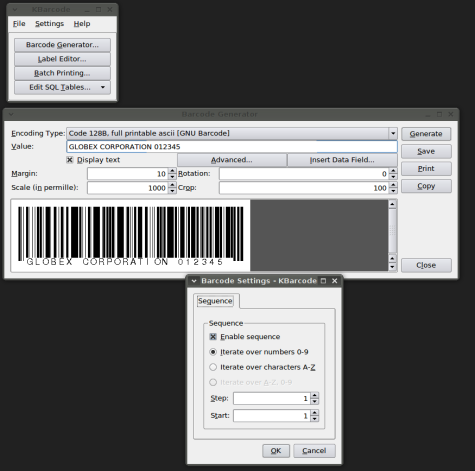
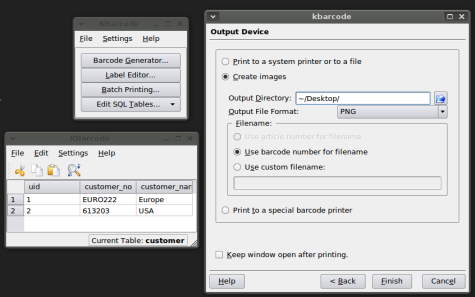
When you launch KBarcode, you are presented with a compact window holding four buttons. Each launches one of the program’s modules in a window of its own — the barcode generator, the label editor, the batch-printing dialog, or the SQL database configuration tool.
KBarcode’s barcode generator window, working on a Code 128 barcode. The “sequence” dialog box is shown.
The barcode generator is a window that lets you construct barcode images from text input. You can select the format from a drop-down list automatically showing all of the formats provided by your installed backends, then enter the text value to be encoded, scaling, rotation, crop and margin options, and inspect a preview of the code by clicking on the “Generate” button. The Generate button refreshes the image, so you can adjust options.
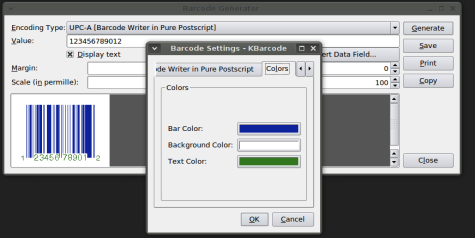
For more complex options, there is an “Advanced” button that brings up a separate window. A backend that supports additional configuration options for the selected format (such as generating a checksum) will display controls for the format here. There is also “Colors” tab for backends that support it, where you can change the color generated for the barcode, any accompanying text, and the background.
The “advanced” generator window presents more options, including color-coding for some backends.
Finally, the “Sequence” tab allows you to generate a sequential series of bar codes. You specify the step size and starting number within the Sequence tab, then back in the barcode generator window, simply use the wildcard character # in your barcode value, rather than a literal number or character.
The barcode generator window uses the various backends to draw images of the codes you define. You can print them directly, copy them to the clipboard, or save them as separate files. For large jobs, you should use the Label Editor instead.
Label and batch processing jobs
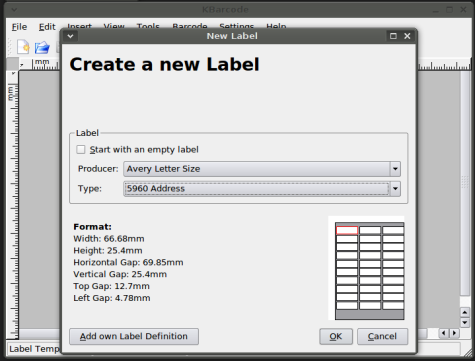
The label editor opens with a template selection window, from which you choose the paper size and Avery-compatible label format that you need. Once selected, the editor opens a design window, with a few basic drawing tools, text editing, and the ability to place a barcode element on your design.
Creating a new label starts with selecting the label type and paper size
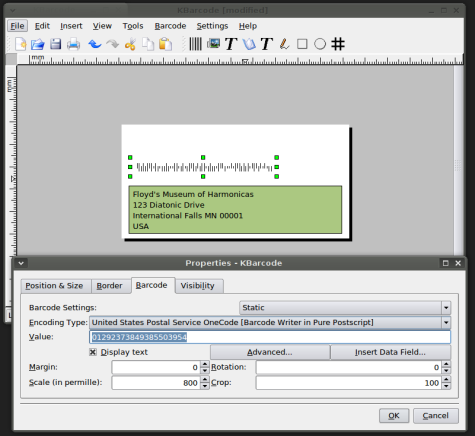
Essentially, you can do all of your basic layout with the editing tools, and place any barcodes with the barcode button. This places a “placeholder” element onto the design. When you double-click it, it opens the familiar barcode generator window, from which you can control its format and contents.
The label editor allows you to use text and graphics tools to lay out your design, and generates barcode content at print time.
This is where the Sequence functionality comes in handy; by defining a sequential barcode here, you can print off an entire page of barcoded labels, card, or tags as a batch. Each of the labels on the printed page gets one increment of the sequence number to replace any # characters in the label value, so setting the starting point is important. You can also define a visibility formula in the “Visibility” tab. The syntax is explained in the PDF manual; to print only label number five, you would enter [index]==5, and so on.
Of course, you can also import a saved barcode image from an external file, just like any other image. Whenever you are done making your design, you can save it for later or print it via the File menu. The print dialog allows you to specify a starting position on the label sheet as well, so be careful if you try to combine this feature with the Visibility formula mentioned above. Choose View -> Preview to debug how various label values will get calculated and printed on the page.
You can also save your label design and print from it using the “Batch print” button on the main window. This option does not let you alter your design at all, only allowing you to choose an existing file and connect it to an optional data source. This can be a KDE address book, data imported from a CSV file, or data saved directly in KBarcode’s database. In addition to printing directly, KBarcode can print directly as a PDF or Postscript file.
Advanced users can take more advantage of KBarcode’s SQL database, which by default stores the definitions of supported label templates, but also a persistent customer data store. Users can enter address data to be used for recurring print jobs (including in sequential printouts), or define their own data fields to further customize KBarcode’s batch-printing functionality. You can even embed Javascript functions and SQL queries into your barcode formulas, allowing you to tie your KBarcode printing jobs into your inventory system.]
The batch-printing functionality can use SQL, CSV, or manually-entered data to bulk print pages of barcoded labels.
Get codin’
Naturally, there are other barcode-supporting solutions out there, but most of them are stand-alone code generators. Similarly, you could generate barcodes of any time using GNU Barcode or Barcode Writer in Pure Postscript, and incorporate the output into a Scribus, OpenOffice.org, or GIMP layout. But KBarcode remains the simplest application for working with barcodes in bulk, for labels, stickers, envelopes, and cards.
By Nathan Willis


Hi Nathan,
Thanks you for this informative article.
It is worth pointing out that there is an updated, lightweight edition of KBarcode called KBarcode4-Light that is written in Python using the PyQt4 Qt bindings, whose barcode engine is based solely on a recent version of Barcode Writer in Pure Postscript:
http://kde-apps.org/content/show.php/KBarcode4-light?content=128926
All the best,
Terry
Pingback: Barcode Writer in Pure PostScript | Worldlabel Blog