
![]()
Supplies:
- Stamp set (I used Dream Silhouettes by Sweet ‘n Sassy Stamps)
- Rubber Brayer (for info about brayers visit this site)
- Worldlabel (or other brand) mailing labels: any size will do really, but for this particular card I used 1″x 2 5/8″ inkjet mailing labels
- Kaleidacolor Ink pad by Tsukineko (I used Royal Satin) or other spectrum type pad (a solid color would work too if you don’t have the other kinds)
- Black Ink (I used Memento Tuxedo Black by Tsukineko)
- Cardstock: neutral and various colors to coordinate with your ink Embellishments
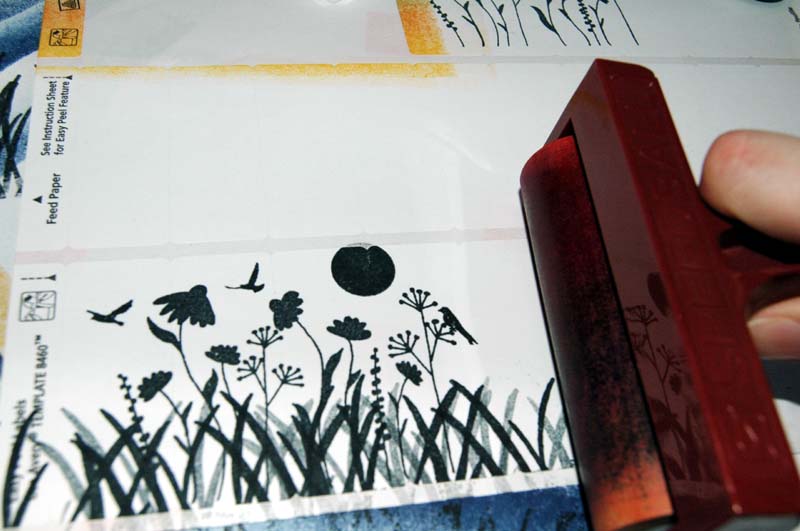
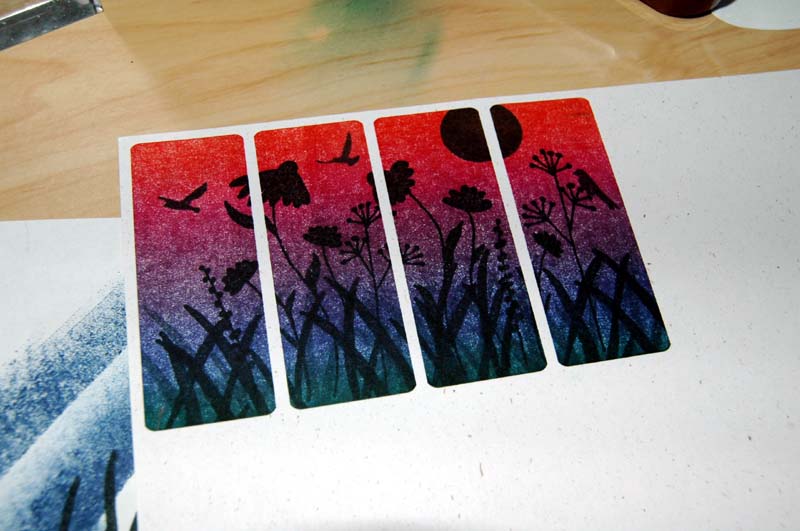
Step 1. Stamp images in black ink DIRECTLY on sheet of Worldlabel (or other) mailing labels. I stamped my images across four labels as you can see here.


Step 2. Ink up your brayer with the Kaleidacolor ink being sure to lift your brayer with each pass. Don’t just roll it back and forth because you won’t get even ink coverage.

Step 3. Roll inked brayer over your stamped labels starting with the label just before or after your stamped labels again lifting your brayer to be sure you get even ink coverage. If you don’t start with the label before or after your stamped image you may get unwanted lines from your starting or ending point.


Step 4. Peel off your stamped, brayered labels and adhere them to your neutral cardstock matte being careful to line them up properly.


Step 5. Trim, mount and decorate your card as desired 🙂

by Korin Sutherland of Sweet ‘n Sassy Stamps
All images copyright Sweet ‘n Sassy Stamps.
![]()

Visit Worldlabel.com and check out the selection of Laser and Inkjet labels.