User interface prototyping is supposed to be a creative discipline, where the tools don’t get in the way, so you can place your ideas on the screen just like you would draw them freehand on the back of a napkin. Up until recently, however, there was not a high quality open source UI prototyper, so designers were left with the less-than-optimal workflow of creating mockups in Inkscape or the Gimp, or else forced to use proprietary web applications that limited storage or added watermarks. Those days are in the past, though, thanks to Pencil.
By Nathan Willis
Pencil is an easy-to-use mockup editing environment; the user simply drags-and-drops UI widgets from a toolbox onto the canvas, and resizes and rearranges them as necessary. The UI widgets remain editable, and are stacked on the canvas as individual, adjustable elements. The result is more like a “paper prototype” and has advantages over designing in a raster or vector editor, with its concerns over layers, rendering, and other inflexibilities. Pencil provides several collections of widgets, covering generic shapes, specific desktop and mobile computer operating systems, and popular Web site toolkits. The application is also cross-platform because, interestingly enough, it is a Firefox browser extension.
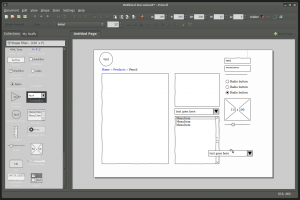
“Pencil can be used to create UI mockups for the web, the desktop, or any other interface. The ‘sketchy’ widgets simulate rough drawings, like in a back-of-the-envelope design. (click on image for large screenshot)”
Installation and setup
You can find Pencil in Mozilla’s add-ons directory, but you should also consider checking the project’s home page to see if there is a newer release. The extension is provided as an .XPI download on the project site; as of press time the link did not initiate Firefox’s automatic XPI installer, but if you choose to save the file locally and open it with File -> Open, the installer will launch.
There is also a stand-alone version of Pencil mentioned on the project’s downloads page. This app uses Mozilla’s XULRunner backend, so that you can run the package as a standard application program if you do not have Firefox installed, or if you simply wish to keep the applications running as separate processes. Presently, however, the packages provided in XULRunner form are not up-to-date. The most recent version of Pencil is 1.2.0, and the XULRunner version provided as a Linux TAR archive is from pre-1.0 builds.
The Pencil project also has links to several extra widget collections that it calls “Stencils.” Currently there are stencil packages for UML flowcharts, business development presentations, the popular Dojo and Ext JavaScript libraries, and icons designed for iPhone mockups and touch-screen gesture display. The Stencil downloads are packaged in .ZIP files; to install them you open it with the “Tools” -> “Install New Collection” menu item in Pencil.
You do not need to install any Stencils to get started however. The 1.2.0 release comes with widgets for essential geometric shapes, basic annotations (such as indicator arrows and text balloons), basic HTML elements, Windows XP and GTK+ GUI elements, a meta-package that picks up the native toolkit widgets of whatever operating system you run Pencil in, and a nice set of free-form “sketch”-like elements that simulate the drawn-loosely-on-paper look. There are even more Stencil collections available from users on the Pencil Users mailing list and its associated wiki.
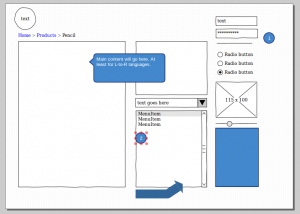
“In addition to the UI toolkits themselves, the annotation widgets allow you to mark up your designs with notes and bullet points. (click on image for large screenshot)”
“Pencil’s ‘Native’ widget set picks up the toolkit from your desktop environment, here, GTK+, but with the correct theme automatically.”
Finally, the project provides several downloadable “export templates” that Pencil uses to create HTML, PDF, or other document formats from your mockups. There are several styles available, depending on the intended usage, so it does not hurt to experiment with several. Unlike Stencils, you do need to download and install export templates separately, or you will be limited to bares-bones output.
Drawing
Once installed, you launch Pencil from Firefox’s “Tools” menu. It opens up a separate window, with basic menus and editing tools across the top, a collapsible list of the installed widget collections on the left, and the canvas on the right. For its overall document structure, Pencil uses the concept of “pages,” each of which is an independent canvas shown in its own tab in the interface. Pages within a document can be different sizes, you can copy and paste elements between them, and even duplicate or delete pages from the right-click context menu in the tab bar.
Within a page, the canvas is shown as a white rectangle with a drop shadow against a non-editable background layer. You can change the size of the canvas only by choosing “Properties” from the right-click context menu on the current tab. There is a grid system, which you can adjust the spacing of and enable or disable snap-to-grid on by opening up Pencil’s “Settings” -> “Options” menu item.
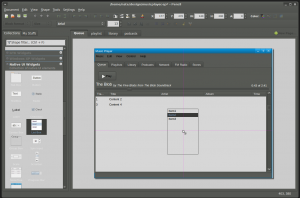
“Every element of a Pencil drawing can be moved around and configured independently, including structures like tables and tab bars. (click on image for large screenshot)”
You place UI elements on the canvas by drag-and-drop with the cursor; this might seem counterintuitive, since you can select elements in the Collections tab as if they were tools — but drag-and-drop is the name of the game. Every element you place has control points at the corners and on the midpoints of each side; when you select an element with the mouse you can resize it by dragging any of these points. The resize is not a scale transformation, however: instead, it resizes the element by lengthening its sides proportionally. In other words, when you resize a text box, you get a larger text box, not a magnified-and-pixelated enlargement of the original text box. Double-clicking on an element allows you to rotate it around any handle.
Many UI elements use text labels, either basic names, or more structure grids and lists, such as you might find in a tree-view or selection widget. You can double-click on any text element and edit its contents directly on the canvas, or open the element’s properties with the right-click menu. There is a very simple syntax for extending the structured text elements; the pipe character | denotes new columns, the hash character # denotes which item in a list is selected, and the asterisk character * denotes which item is highlighted. There is some variation as to the support for # and * if different widgets, but which one works is always easy to determine.
Several of the compound widgets you need for GUI prototyping support more direct adjustment than simple highlighting. For example, you can change the “progress” shown on the progress bar indicator by dragging a special handle that appears when you select the widget. You can create a tab bar with as many tabs as you need (added by editing the tab labels and inserting pipe characters), and even change which one is selected by putting a hash character in the tab name.
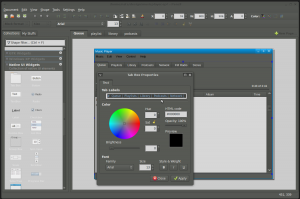
The toolbar at the top allows you to manually adjust the settings of any selected element — from its precise X,Y positioning on screen, to foreground and background coloring, to text properties like font and alignment. Of course, the emphasis in Pencil is on quick-and-easy manipulation of objects. To make this easier, whenever you drag an element or a resize handle, horizontal and vertical guide lines appear whenever you drag it to within a few pixels of a nearby element — thus allowing you to place objects into perfect alignment without resorting to worrying about their specific X,Y coordinates.
You can add images (such as icons, photos, or screen content) by dropping in the “Bitmap Image” element from the Common Shapes widget collection. The right-click menu for this element allows you to either import an image, or link to it (in which case the image file must remain in its present location or else the link will break). Some UI widgets, such as buttons, also allow you to attach an image file as one of their properties. Finally, Pencil includes a built-in search interface linked to the Open Clip Art Library. Using this feature, you can search and browse through scores of Creative Commons-licensed art and design elements, and import them directly into your mockup. It is a handy feature that beats trying to maintain a Pencil-specific clip art collection.
Exporting and sharing your designs
The drawing tools essentially give you total freedom to design your mockups as best you see fit. There are a few quirks here and there, such as the automatic truncating of text in tables and list box widgets, but for the most part the sky is the limit. Before you can use your prototypes to change the world, however, you need to export them into a common output document format. This is where Pencil’s export template system comes into play.
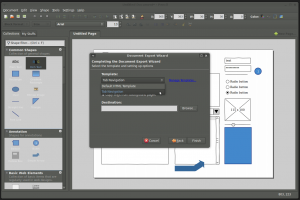
If you simply select “Document” -> “Export Document” from the menu, the default export window pops up. From here, you can simply save the mockup as a series of PNG files, one per page. You can also use this dialog to export to HTML, PDF, OpenOffice’s .ODT, or even Microsoft Word .DOC. However, all of these export options require you to install an export template like those provided at the Pencil Web site. Technically, you can still select an output format like HTML without a template installed, and the export wizard will step you through the process, but all it will do in the end is generate unlinked PNG files and drop them in a directory.
“Export templates allow you to theme and style your final output, for the web or for PDF / ODT / DOC documents. (click on image for larger screenshot)”
Export templates are provided for download in .ZIP archives. To install one, simply save it locally in its Zipped form, then open it from within Pencil’s “Tools” -> “Manage Export Template…” menu item. One important caveat for this process is that Pencil requires you to choose either HTML or “Text Documents” (a category including PDF, DOC, and ODT) when you install each template — you can choose the wrong type, and Pencil will not warn you that the template is incompatible; you’ll only find out that you installed it to the wrong section when you try to export.
The installed templates will be available for use immediately, appearing in the export wizard. For some reason, when exporting to HTML, Pencil chooses the filename “index.html” for you automatically, which can overwrite other exports in the same directory, but requires you to manually specify a filename for other document types.
The templates provided at the Pencil project site are fairly minimalist; if you are interested in HTML output, you will probably need to either perform some heavy CSS theming on the results, or write your own template for further usage. The project site, unfortunately, does not host documentation on producing your own export themes, but it is easy enough to read through the basic themes and get the idea — themes consist of an XSLT style sheet, an XML file containing basic template properties, and external resources (such as images) that will be included in the final output.
All in all, Pencil’s main strengths are its ease-of-use: creating a mockup is drag-and-drop simple, editing even tricky elements like multi-column text is straightforward, and the snap and alignment tools make creating neat, organized images easy. If you have far-out ideas, you may be better off creating prototypes form scratch with a raster editor like the Gimp, but for many cases, the quick turnaround afforded by Pencil makes it a win.
by Nathan Willis

Good information. Thanks