So you want to set up a photoblog to showcase your best photographic creations, but you are not sure where to start? Fear not, using the excellent WordPress blogging software, you can have a photoblog up and running in no time.

1. Install WordPress
Before you grab and install WordPress on your server or hosted Web space, make sure you have the required components: the Apache Web server, PHP, and the MySQL database server. Also, you need to create a MySQL database for use with WordPress. Once you’ve done that, download the latest release of WordPress. Unpack the downloaded archive and rename the wp-config-sample.php file to wp-config.php. Open the wp-config.php file in a text editor and specify the required database connection info. Save the file and move the contents of the wordpress directory to the document root of your server. Point your browser to http://127.0.0.1/wp-admin/install.php (replace 127.0.0.1 with the actual IP address of your server) and complete the installation. For a more detailed description of installing WordPress, visit http://codex.wordpress.org/Installing_WordPress. Finally, create the wp-content/uploads directory and make it writable by the server. This directory will be used for uploading and storing your photos. Log in to your WordPress installation, switch to the administrative interface, and tweak the blog’s settings to your liking.
2. Install a Photoblogging Theme
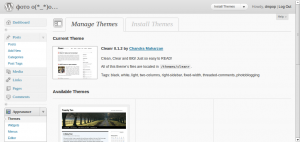
Next, you should install a photoblog-friendly WordPress theme. You can find dozens of free and commercial WordPress themes on the Web, but for starters, you might want to try the Cleanr theme. To install the theme, download and unpack it, then move the resulting cleanr folder to the wp-content/themes directory. In the administrative interface of your blog, switch to the Appearance | Themes section and activate the newly-added theme.
(click on image for full view)
3. Install Plugins
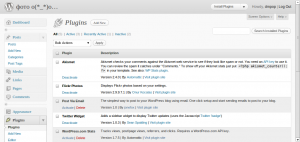
The official WordPress plugin repository features hundreds of nifty modules which you can use to extend your photoblog’s default functionality. For example, the Flickr Photos plugin allows you to pull photos from your Flickr photostream and display them on your photoblog. And if you want to display your latest tweets from your Twitter account, you can do so using the Twitter Widget plugin. No matter which plugins you choose to add to your photoblog, the installation and activation procedure is the same. Download and unpack the desired plugin, then move the resulting folder to the wp-content/plugins directory. In the administrative interface of your blog, switch to the Plugins section and activate the added plugin. Depending on the plugin, you might also need to configure its settings. For example, to make use of the Flickr Photos plugin, you have to switch to the Appearance | Widgets section, add the Simple Flickr Photos widget to the sidebar, and then specify the required plugin settings.
(click on image for full view)
4. Install the WordPress App
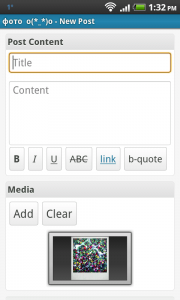
The WordPress app for Android and iPhone/iPod can come in handy not only when you need to tweak your photoblog’s settings, but also when you want to publish a photo while on the move. If you are using an Android device, publishing a photo on your blog using WordPress couldn’t be easier. Assuming that the app is installed and configured on your device, find the photo you want to publish (you can use the built-in Gallery app or a third-party file manager for that), choose Share and select the WordPress item. This creates a new blog post with the photo attached to it. Add a title, description, and tags, select Publish from the Status drop-down list, and press the Upload Now button to publish the photo.
BY DMITRI POPOV


Pingback: Tweets that mention Set Up a Photoblog in 4 Easy Steps | Worldlabel Blog -- Topsy.com
Pingback: infoawl.com