

With the addition of iWork for iCloud, Apple has made it possible to use pre-made label templates with the web-based word processor. This process is relatively straightforward, so you’ll be printing labels from the cloud in no time.
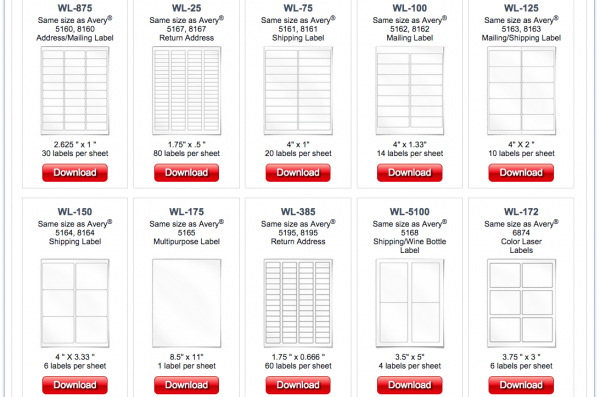
Before starting, make sure to download a free label template that fits your needs. Any template will work, but we highly recommend WorldLabel’s selection of free Pages labels. There is a ton available for download, including standard Avery labels, CD labels, and others.
Part One: Converting Your Template to a Pages File
Before using a standard .template file with Pages for iCloud, you must convert it to a Pages-compatible file. Doing this is easy, and requires just two simple steps.
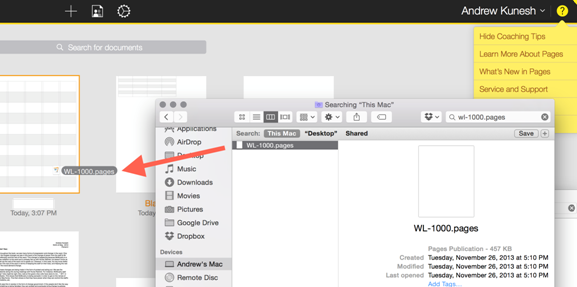
1. Right-click on your template and select “Get Info”.
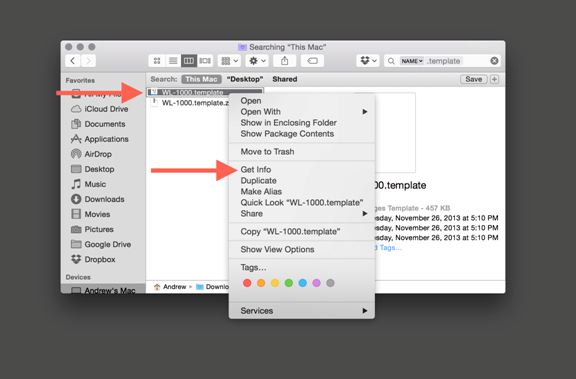
Locate the template you’d like to convert, right click on it, and select Get Info from the drop-down menu.
2. Change the file’s extension to “.pages”.
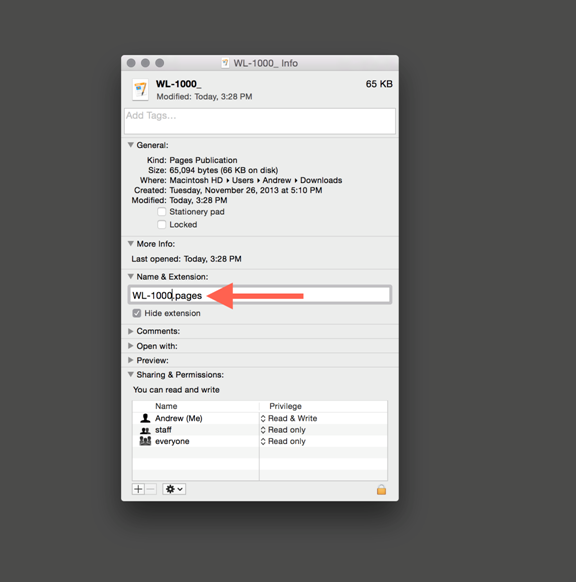
Under the Name & Extension header, you’ll see the file’s name in a textbox. Change the file’s extension from “.template” to “.pages” and press the Return key on your keyboard. Your template is now a Pages-compatible document.
Part Two: Using Your Template in Pages
Like stated earlier, adding templates is a very simple, drag-and-drop process. Keep in mind that you must have a free iCloud account before you can use Pages for iCloud.
1. Log-in to iCloud 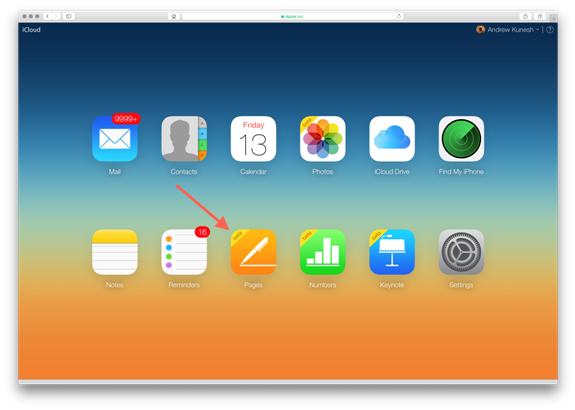
Log into iCloud on your favorite web browser. Then, look towards the bottom of the landing page and click on the Pages icon to launch Pages for iCloud.
2. Drag-and-drop your template
Locate the Pages-compatible label on your computer and select it. Then, drag-and-drop it onto the Pages for iCloud window in your web browser. The template will then open in Pages for iCloud automatically.
3. Edit your documents as usual.
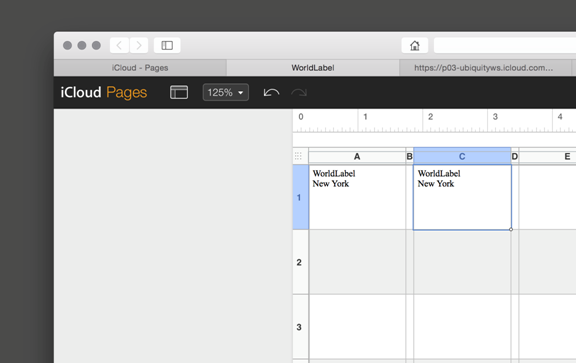
You can add content to your labels as you would in Pages for Mac: just click into any content box and start typing to add content. To add an image to your label, drag it into Pages for iCloud and resize it.
Printing Labels In Pages for iCloud
Printing labels from Pages for iCloud requires you to download the labels as a PDF first. After downloading, there are a few steps you must follow to make sure your labels print properly.
1. Press Command-P on your keyboard.
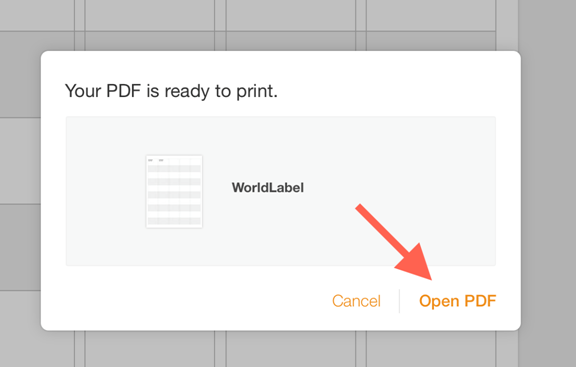
To export your labels to a printable PDF, press Command-P on your keyboard while still in the Pages for iCloud document. A pop-up menu will appear.
2. Press the Open PDF button from the bottom right-hand corner of the PDF pop-up menu.
Click the Open PDF button from the lower right-hand corner of the pop-up menu. Your PDF will open in a new tab.
3. Press Command-P on your keyboard to bring up the print screen window. Edit the print settings, and press the Print button when you’re ready to print.
From the PDF, press Command-P again to bring up a print screen. Then, edit all necessary print options and then press the Print button from the bottom right-hand corner of the print screen to print your labels.
Conclusion
In this tutorial, we taught you how to use standard label templates in Pages for iCloud by converting them to a .pages file. Additionally, we showed you how to export labels from Pages for iCloud and print them using Apple’s print screen.
Information here is very clearly explained, nice blog
Print Malaysia