by Nathan Willis
The open source 3-D modeler Blender can perform so many different jobs that it can get a little intimidating. In addition to designing three-dimensional objects, Blender can handle rigging, character animation, kinematics, video editing, video game design, and in fact almost the entire tool chain required to produce a 3-D movie. Fortunately, if you have more modest goals in mind — say, simply creating a 3-D logo, Blender can do the job without forcing you through the entire learning curve … if you know where to look for help.
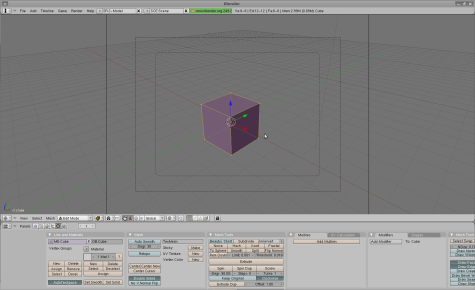
“The Blender user interface; even at start-up it can be intimidating to the new user, so it is helpful to run through a tutorial just to familiarize yourself with the tools.”
LEARNING YOUR WAY AROUND
The Blender project actively provides training resources, including books and classes through the Blender Foundation, as a fund raising mechanism to support ongoing development. The Blender site includes a large collection of online tutorials, mostly contributed by project members, in HTML and video formats.
The Blender wiki also has tutorial and manual sections of its own, although you should expect that content on the wiki is more likely to be incomplete than material found on the main site. Finally, there is a wide array of external Blender resources produced by the community and Blender artists.
You will want to begin by familiarizing yourself with the Blender interface. For starters, consult the Blender User Interface Tutorial on the main site, which walks you through the various on-screen and menu interface elements, some Blender-specific terminology, and how to configure UI options to your liking. For example, Blender terminology refers to what most other applications would call the menu bar as the “info window,” and what most apps would call the tool palette as the “buttons window.”
You will also need to get familiar with the Blender UI’s color and widget schemes; the UI is implemented in OpenGL, not a standard toolkit like GTK+ or Qt, so it uses its own widgets that do not inherit the colors or active/inactive/gray-out look of other desktop applications. Finally, be prepared for the fact that Blender uses a tremendous number of key-combinations for commands and modifier keys (Shift, Alt, Control, and a combination of the three) in concert with left, right, and center mouse clicks. You may have difficulty following the Blender tutorials if you do not have a three-button (or more) mouse or a full-sized keyboard including a separate number pad. A good place to learn more in-depth info about the command and interface structure is the tutorial entitled The Blender Windows.
After you read both of those tutorials, check out the “Interface Concept and “3D Viewport” video tutorials; these will help reinforce the text with actual UI interaction demos. The wiki also has resources, including a Hotkey Reference, and a one-page, printable command and UI reference you can keep at your desk — which, you should note, is formatted for A4-sized paper.
YOUR FIRST EDITS
Of course, grokking the interface is only the means to an end; learning how to model is the real goal. The best general introduction to modeling itself is found in the online wikibook Blender 3D: Noob to Pro. The book covers beginner to advanced topics, but its “Learn to Model” chapter is second to none.
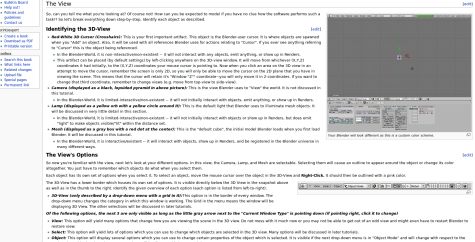
“A page from ‘Blender 3-D: Noob to Pro.’ This wikibook takes a very structured approach to teaching basic modeling.”
If you already understand 3-D modeling, some of the material may be repetitious, but for newcomers the chapter contains valuable explanations of concepts often tossed around in other tutorials, like meshes, views, materials, and NURBs. In addition to that, the modeling instructions start with simple geometry, such as extruding cubes from two-dimensional rectangles, and introduce concepts like subsurfaces and “creases” along the way to extend your simply geometry into more complex shapes.
There are other quality tutorials at the Blender site itself, most focusing on a particular modeling task. This is fortunate for new users because Blender’s tool set contains a lot of specialized functionality. Exactly how much you need to learn depends entirely on what you want to do. The A Simple Winter Scene tutorial, for example, focuses on basic mesh objects like spheres and cones, and explains how to create models with resizing, duplication, and other introductory techniques. The Hillside Tutorial, on the other hand, involves subdividing meshes and deforming objects by moving vertices and smoothing. Fun with NURBs explains surface curves, which you can manipulate with control points, and introduces smooth surfaces made with skinning.
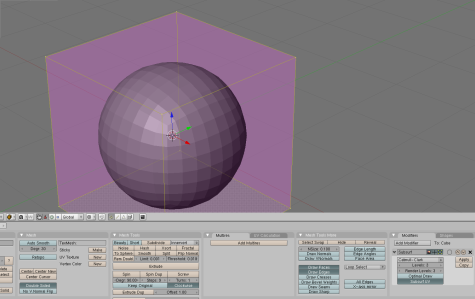
“Working through the tutorials helps you understand concepts like subsurfaces while using simple models — before diving in to complex geometry.”
The Blender site’s video tutorial section contains video lessons on subdivision surfaces and working with materials and textures, but these are perhaps too advanced for the genuine newcomer. Check back, though, because new content is always being added.
The wiki section on modeling contains many more tutorials, including Introduction to Modeling and in-depth sections on meshes, curves, surfaces, and more. These tutorials tend not to receive frequent updates, however, and some remain unfinished, so it is probably best to consult them as reference material rather than to expect step-by-step instruction. However, some focus on specific techniques that may be of interest, such as extruding a shape along a path, so be sure you at least take a look.
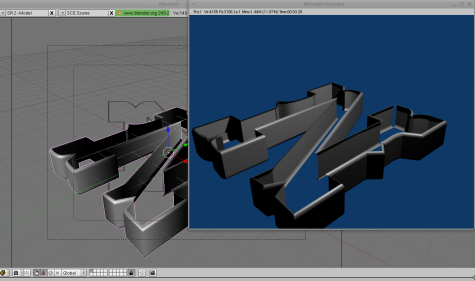
Creating a Logo is a very practical tutorial; it describes the process of creating a three-dimensional logo from a 2-D drawing or image. The process is not the least bit painful. Roughly speaking, you can add the 2-D image as a background layer in Blender, then trace it with curves. The curves, when you fill them out with some depth, become the 3-D version of the original drawing, which you can render from any angle and with a variety of lighting effects.
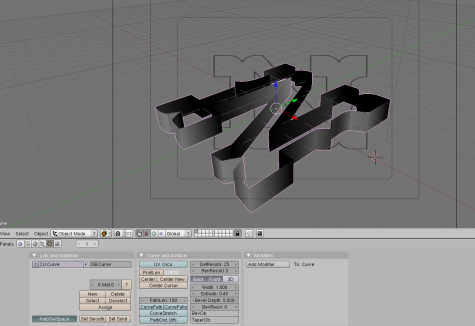
“The ‘Creating a Logo’ is one of the more practical, since it focuses on a basic task and static imagery.”
OUTPUT
Naturally, whichever modeling techniques you use, you will eventually need to render your work in a standard image format. Blender 3D: Noob to Pro contains a good chapter on rendering; while incomplete in some places, it steps you through the overall rendering options, including camera placement, image formats, resizing output, and color palettes, as well as Blender’s built-in rendering options: shadows, environment maps, oversampling, ray tracing, and radiosity.
“Blender’s built-in renderer can perform a quick render of the scene almost instantaneously, but to get better final results you should read up on the options.”
If the lighting options discussed seem too complicated, you should consider taking a look at the tutorial entitled Radiosity, which explains how to do “global illumination” rendering. With the GI technique, you light the entire scene (from every angle) uniformly, without having to worry about lamps and shading. GI is a good option if your design is no-frills, and you are not worried about achieving a photo-realistic look.
Blender supports several other important rendering options, including the amusing “toon shading” that produces a flatter, cartoon-like look, and the ability to farm out rendering to external renderers like Yafray.
In general, achieving a good render involves a bit of trial-and-error. But it is a task simpler in scope than 3-D modeling itself, so even if you are completely new to 3-D and Blender, don’t be afraid to check out all of the rendering tutorials and experiment. After all, you want to create a memorable image, and rendering is the final step in that process. Don’t leave it to chance.
DIGGING FURTHER
You can’t learn Blender overnight, unfortunately, even if you only need to use a sub-set of its tools, such as producing static 3-D images. But that’s because, for most people, thinking in three dimensions is hard, and drawing in three dimensions (on a two-dimensional screen) is even harder. All of the techniques Blender offers to build 3-D models — meshes, skins, NURBs, extrusion — are just shortcuts to help you get from the design you can picture in your head to a concrete, well-defined model inside the computer. They take some getting used to, and more than that, they take practice. But there’s no reason to feel intimidated by them.
After you’ve worked your way through the tutorials mentioned here, consider going through a few others, such as the Intermediate and Advanced tutorials in the Blender site’s Modeling category, as well as the Materials and Light sections. Getting familiar with materials and lights can help you achieve significantly more realistic-looking final output.
You should also consider purchasing a Blender reference book, such as The Essential Blender, The Official Blender Guide, or Blender Basics. The material is similar to what you will find in the online references, but is guaranteed to be complete, professionally edited, and you can more easily bookmark and scribble notes into a printed volume than you can in your Web browser — a fact you should never overlook when learning a new subject.
You’ll find good online tutorials at other sites, too, such as tutorialized.com, cgtutorials.com, and elsewhere. Just as important is the online Blender community; check out blendernation.com and blenderunderground.com — both have tutorials, resources, and friendly community members who once started out as a complete newcomer to Blender as well.
By Nathan Willis

Pingback: links for 2010-03-04 @ <CONTENT /> v.5
Pingback: Links 4/3/2010: Korea’s “Red Star” (“붉은별”), New OOo Logo | Boycott Novell